Polishing Techniques

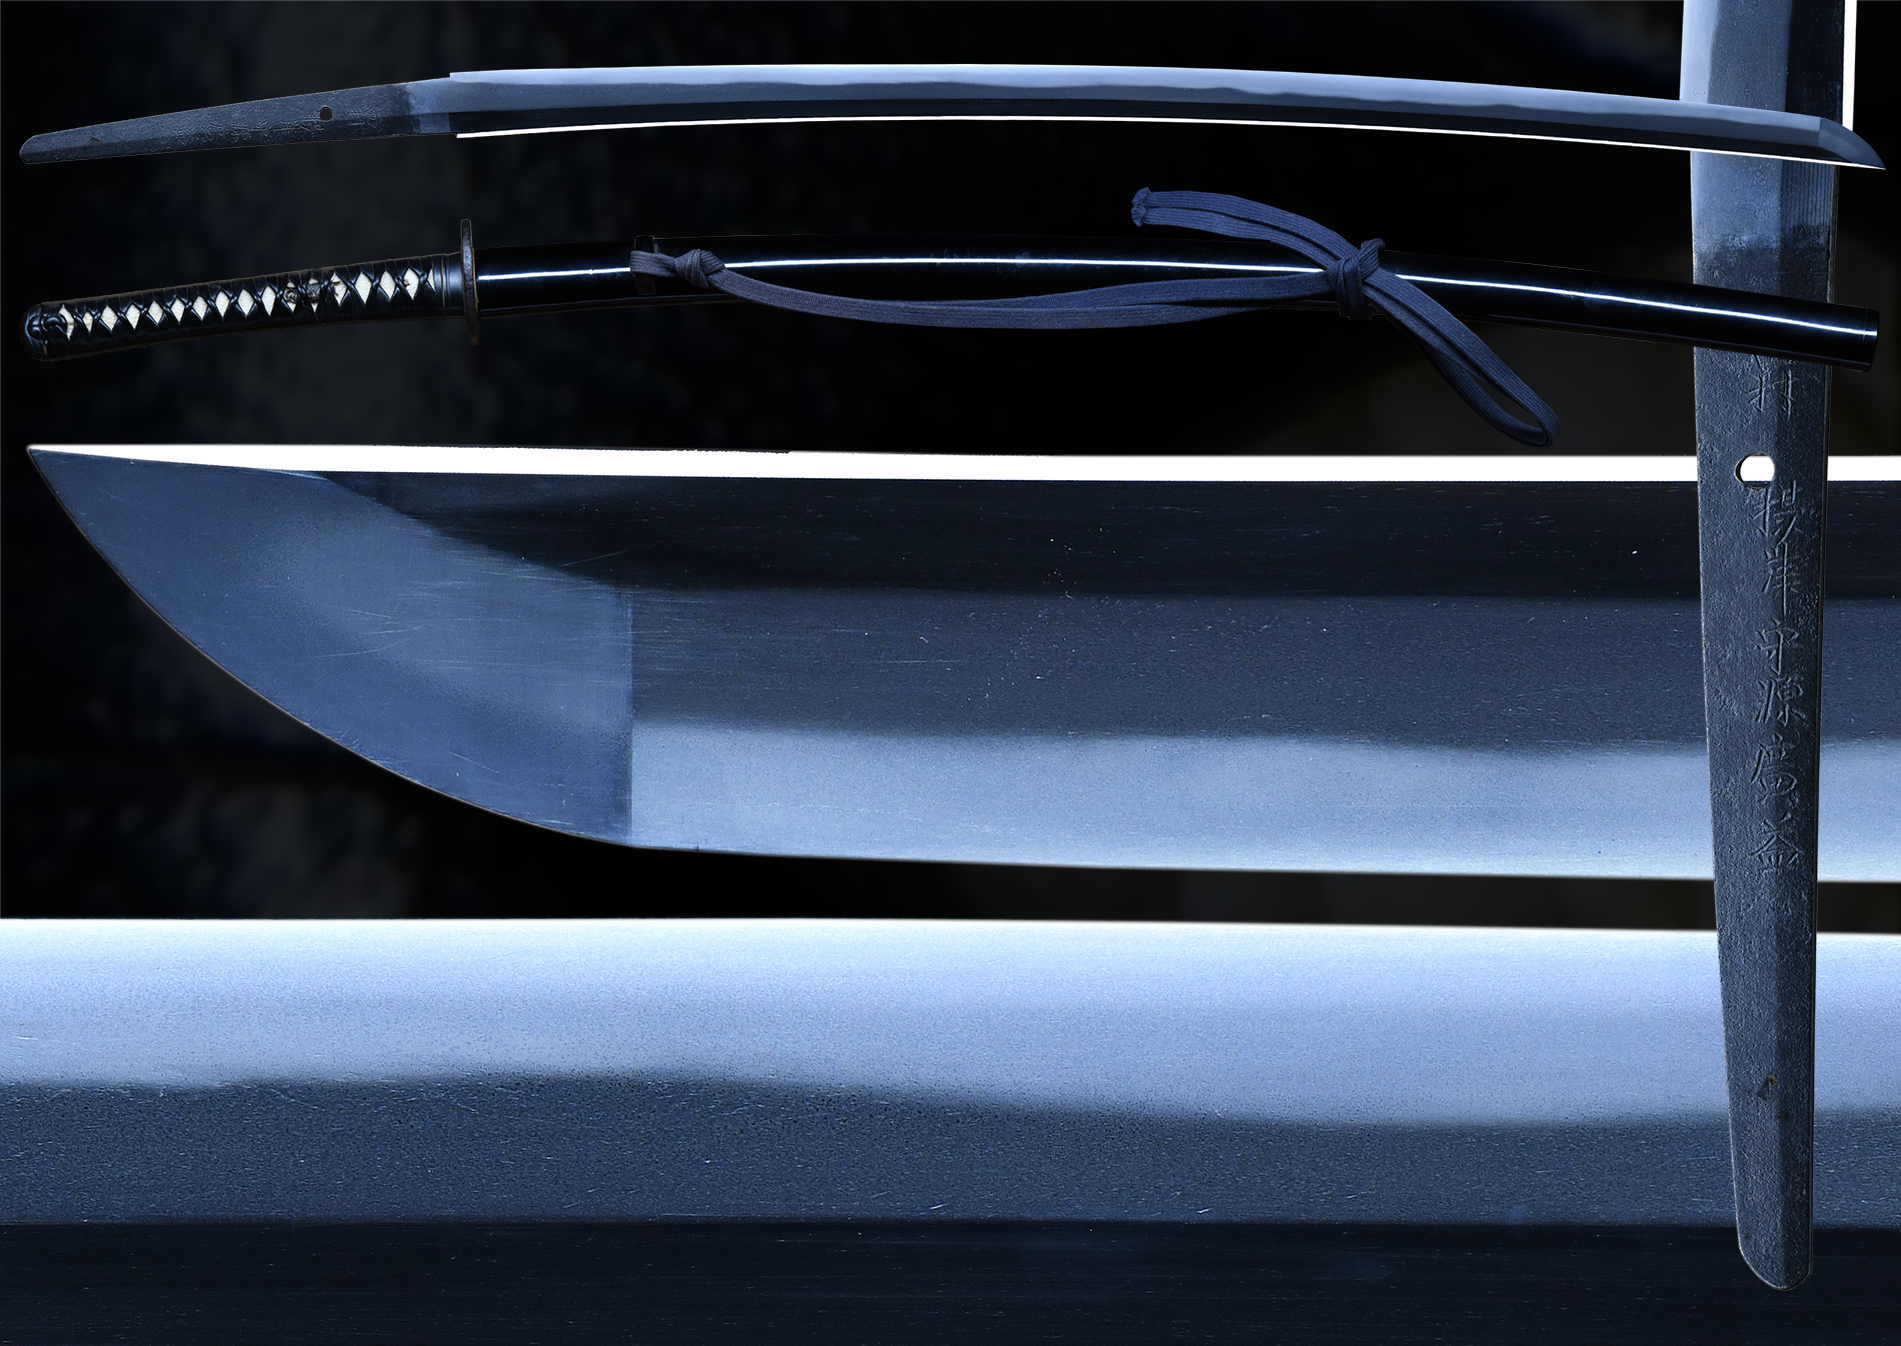
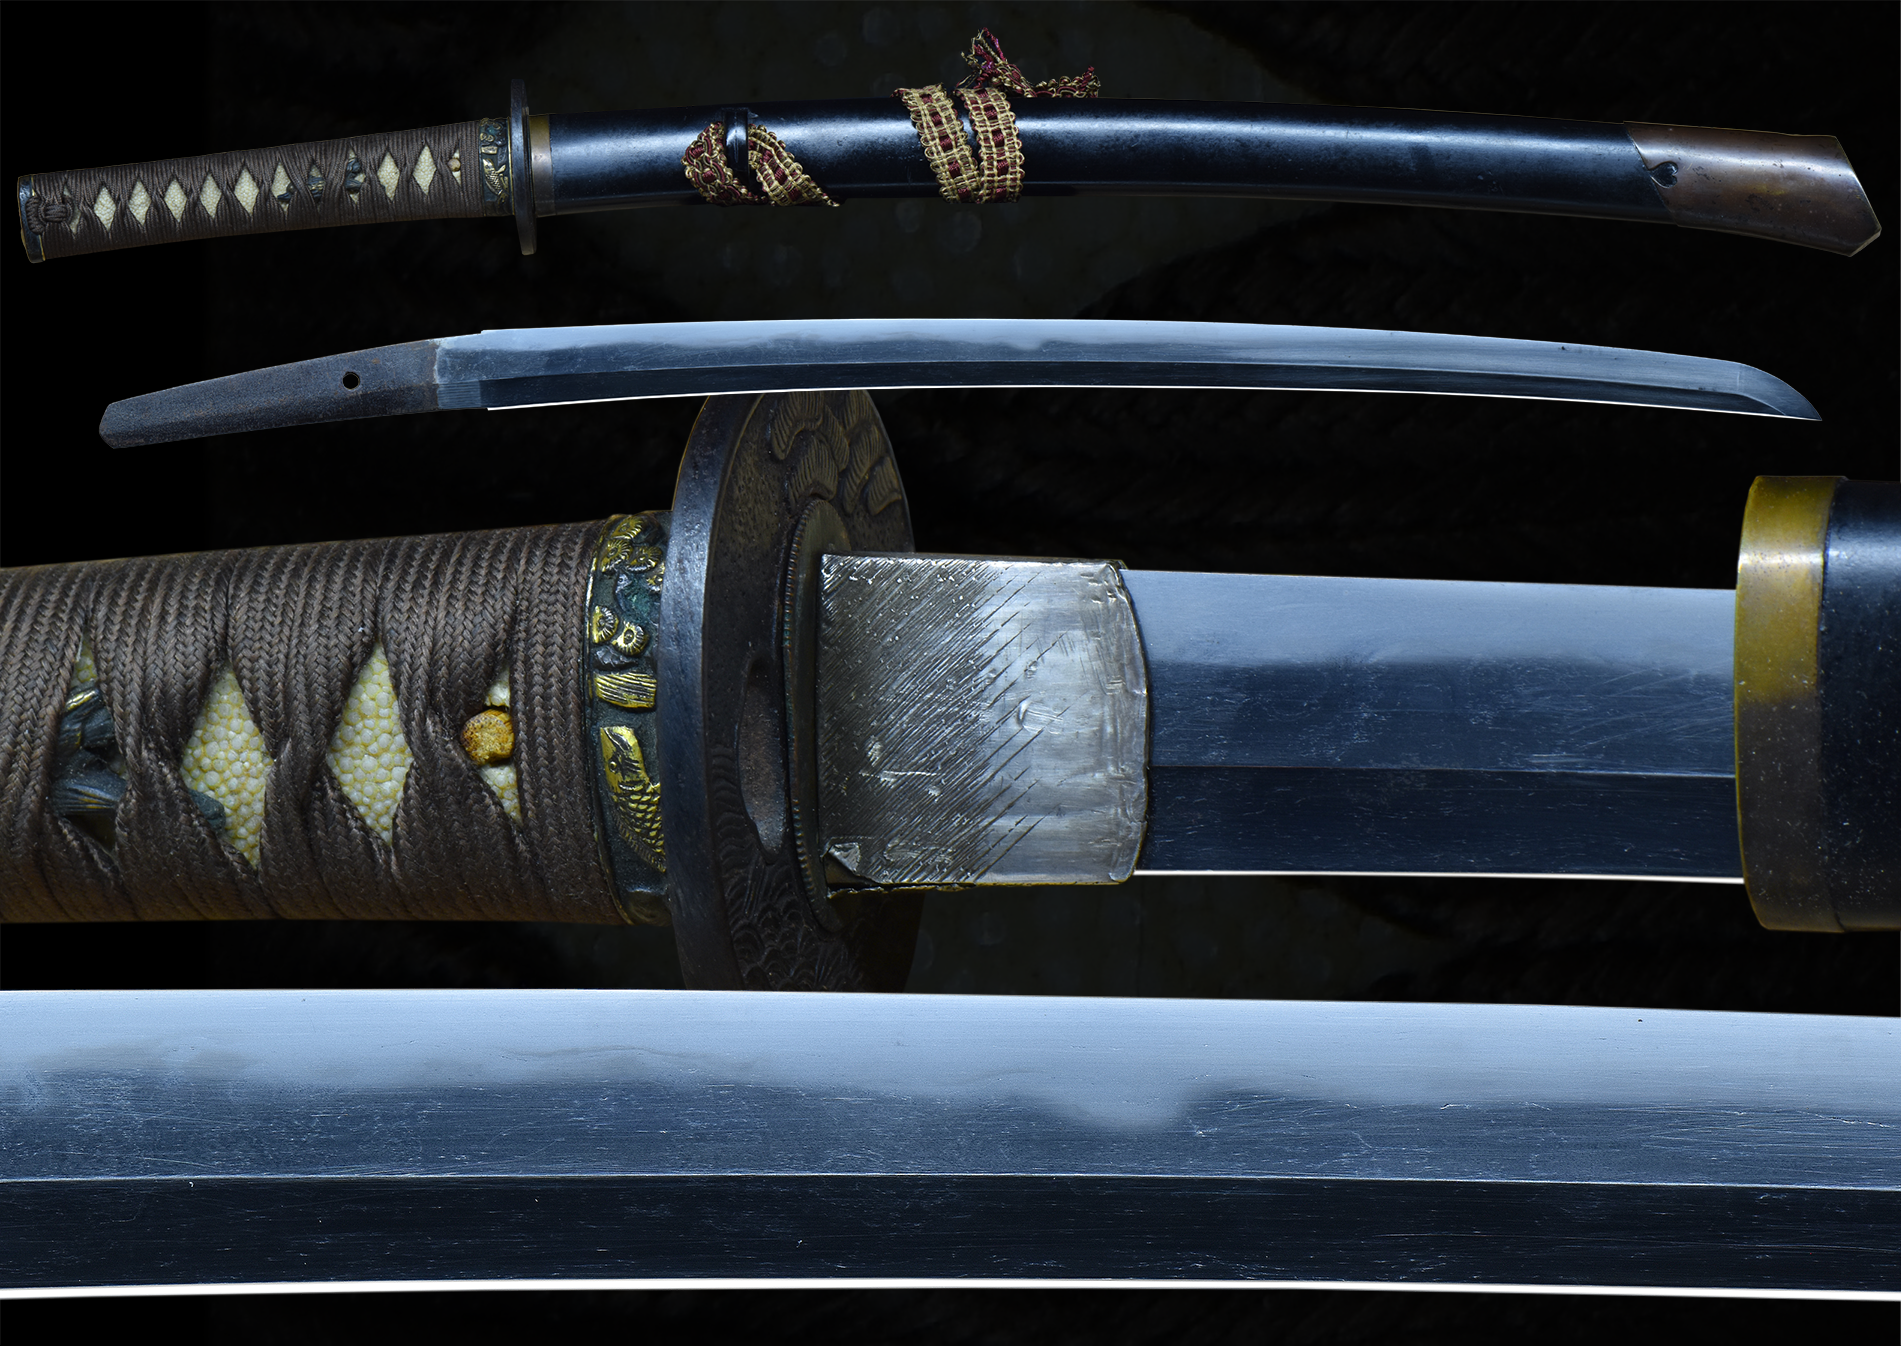
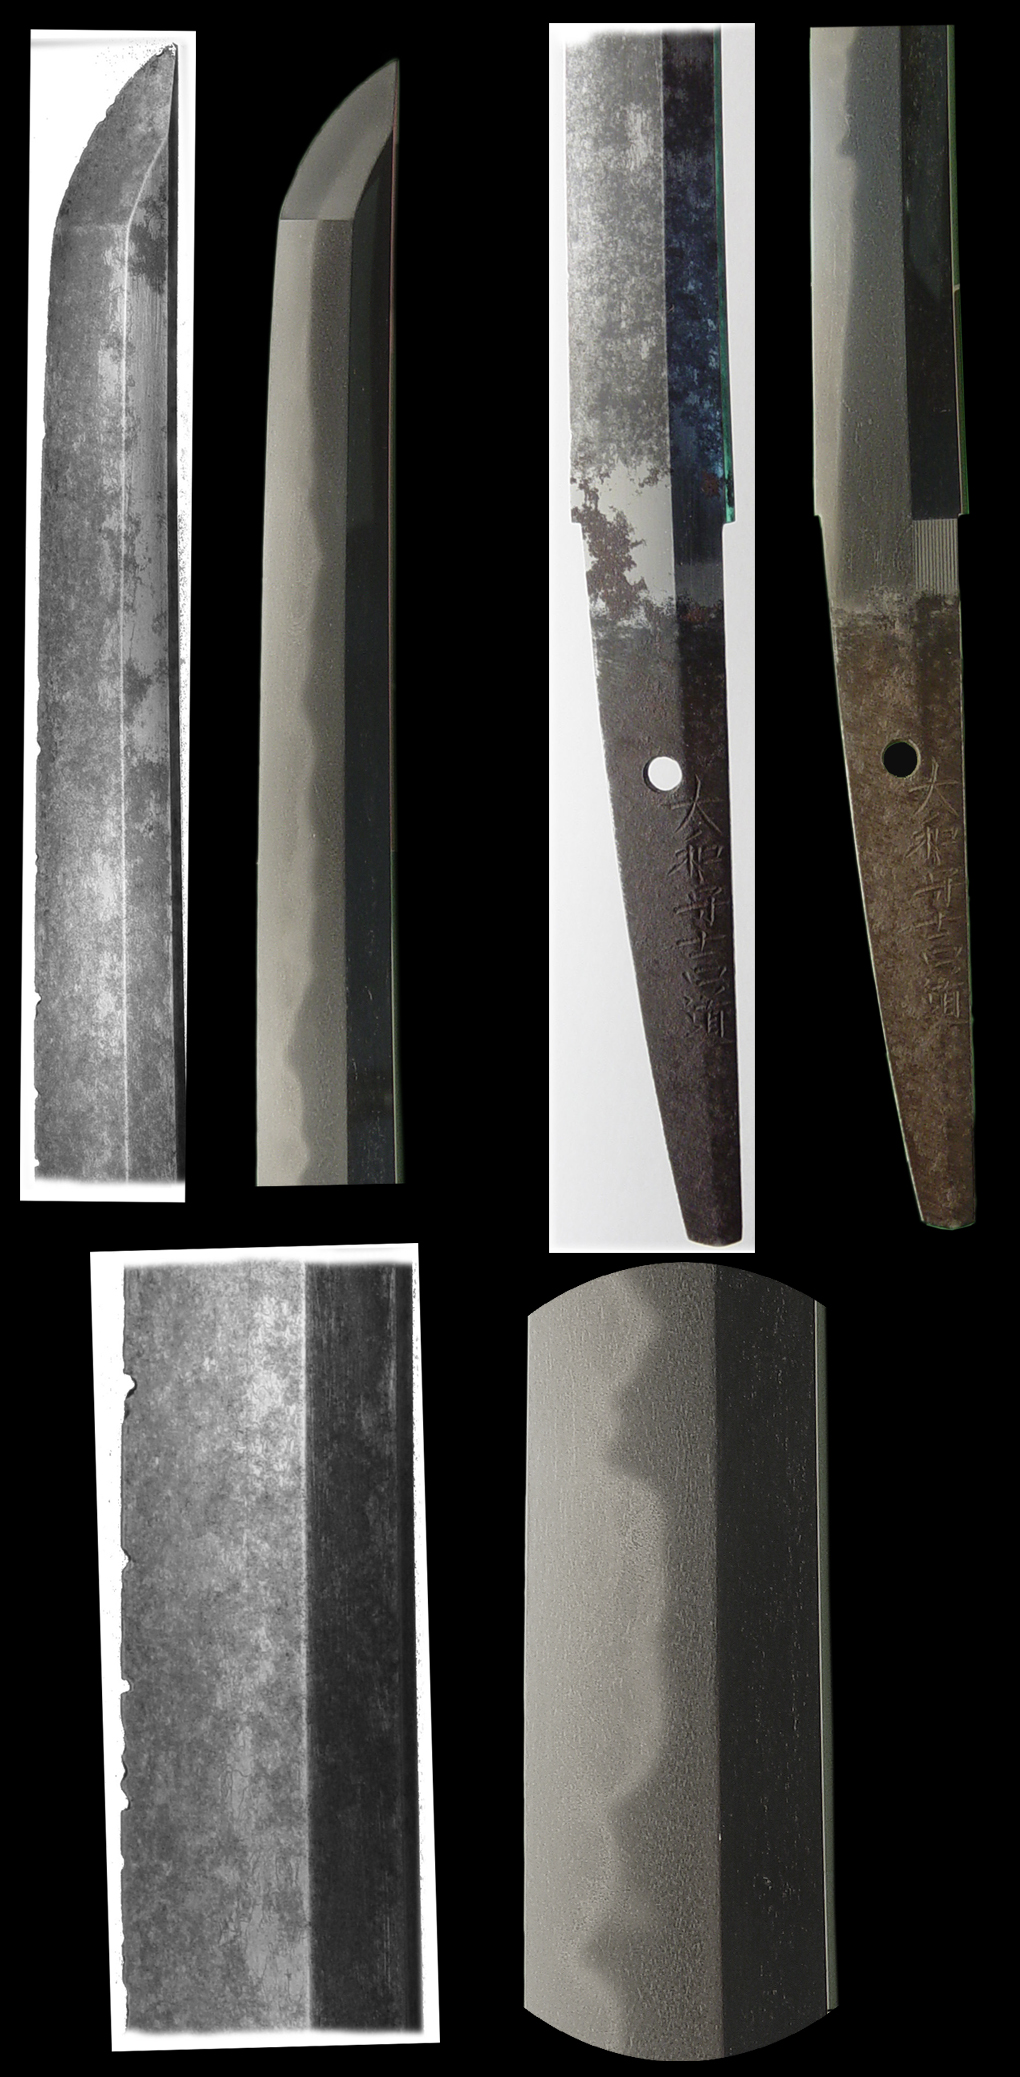
Lets start with this sword. It is signed Yamato no kami Yoshimich, a well known smith. It is in a deplorable condition and would be a very desirable sword in a full polish.
Click to Enlarge Image
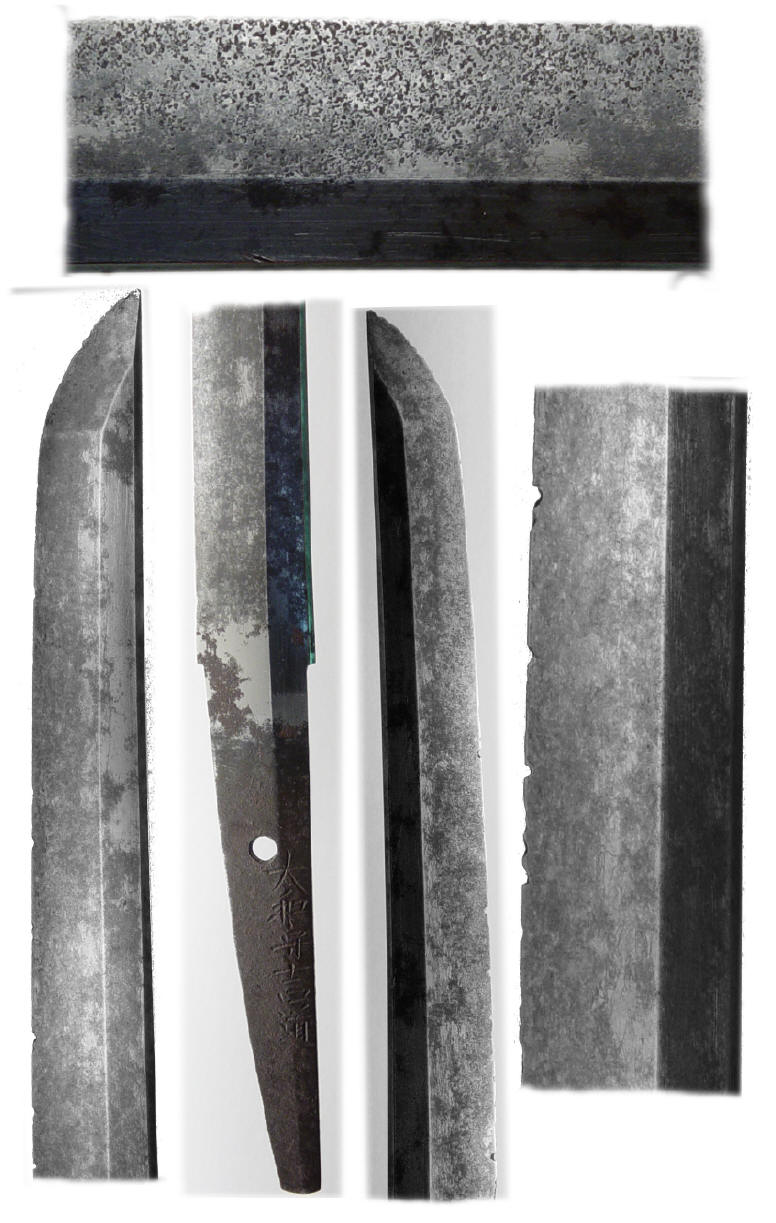
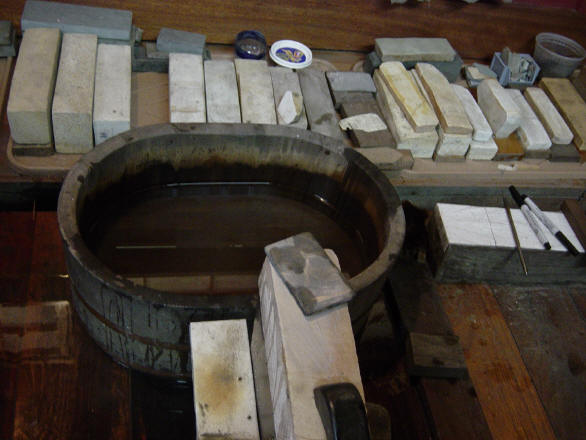
The first step is to evaluate if it can be polished and brought back to a beautiful condition, and I feel that it can be. On a sword that has a large amount of rust and damages like chip (hakobori) it is a little bit of a gamble, but I feel confident that it will be fine and prepare to polish the sword. Selecting the correct stones is critical to achieve the the best results. I have to remove the rust and the chips on this sword and at the same time keep the correct shape and geometry. All the lines on the sword must be sharp and the Niku on the blade must not be removed.
Click to Enlarge Image
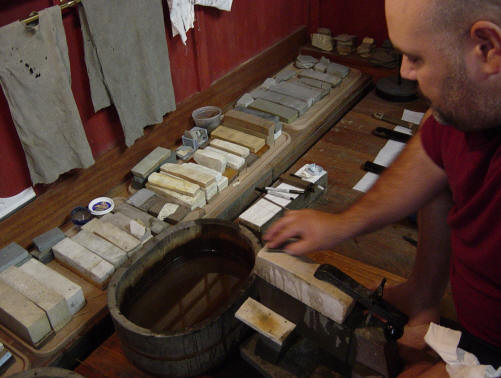
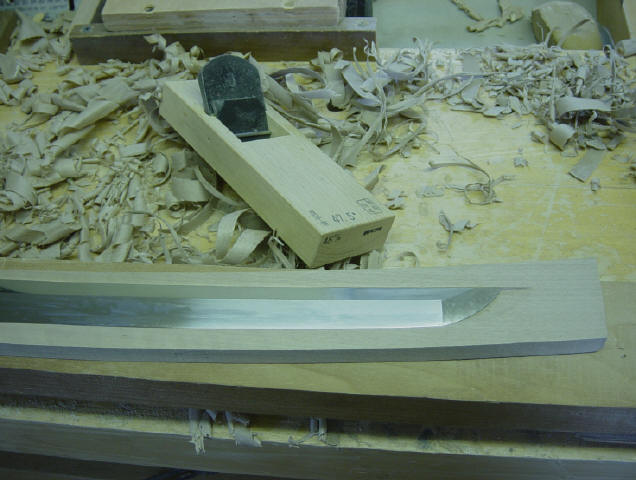
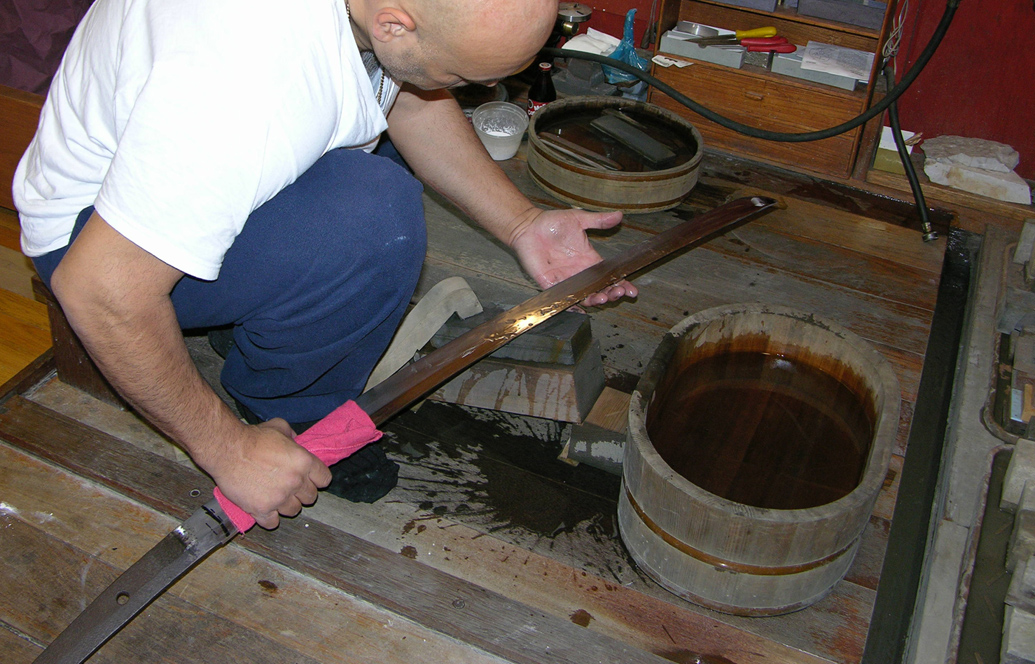
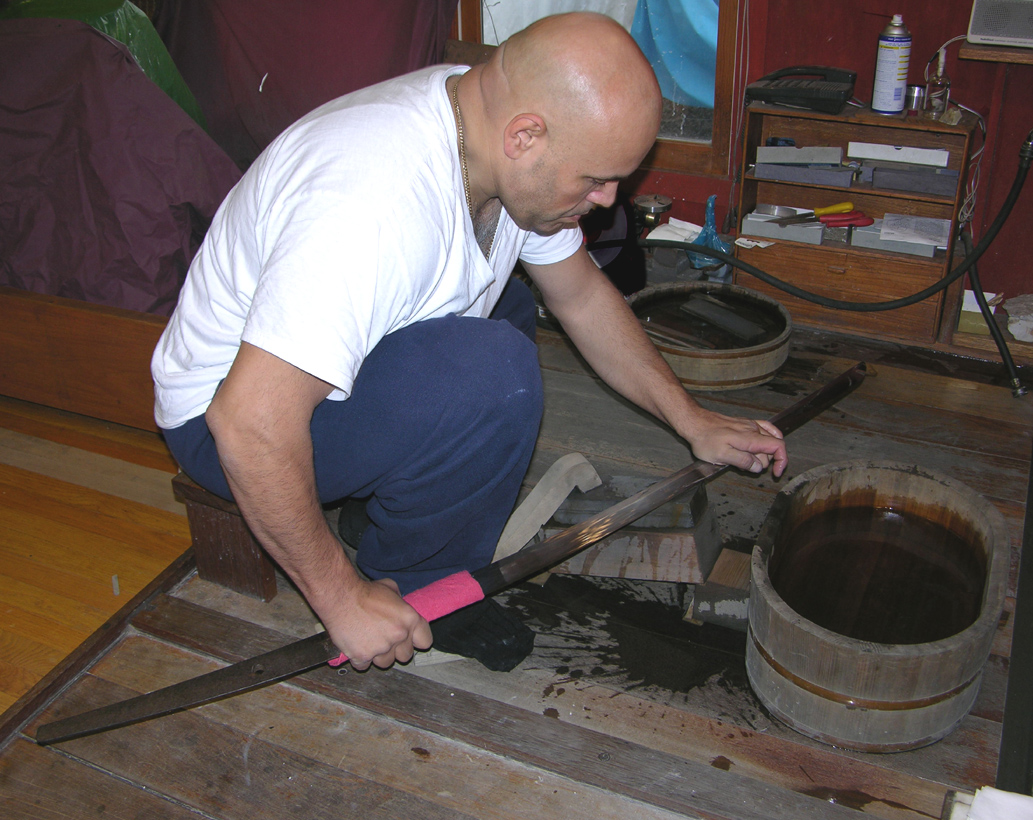
After selecting the stones needed, I get to work. The stone has to be dressed to achieve a good shape. The shape of the stone is very important to help you maintain a good shape on the sword.
Click to Enlarge Image
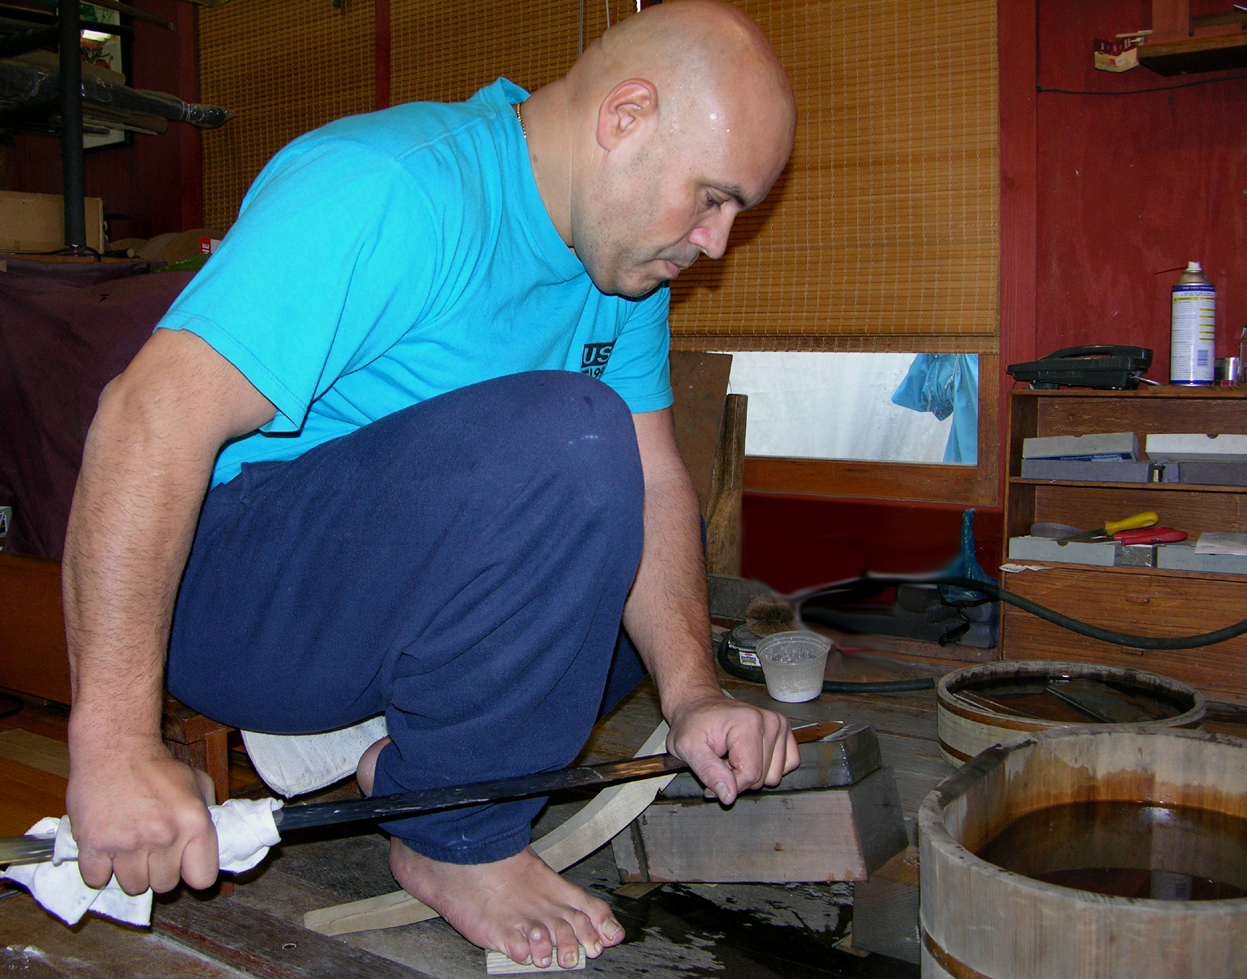
The Mune and Shinogi are the first to be polished followed by the Ji.
Click to Enlarge Image
Click to Enlarge Image
Next is the point (Kisaki). This area of the sword is very delicate and the mitsukado must be correctly polished. If too much of the metal is lost in the Mitsukado area, then sword will be ruined. The placement of the Yokote is also important for a beautiful polish.
Click to Enlarge Image
Click to Enlarge Image
Through all of this, I want to remove as little metal as possible. Generally I try to start with the BINSUI stone, but on this particular sword, I will have to start with an ARATO stone. With this stone I will remove the majority of the rust and chips on the blade and also establish the foundation of the sword. After that, I go to a BINSUI stone to remove the scratches left by the ARATO stone and change the angle of the sword on the stone so as to see the difference between the ARATO and BINSUI marks. The BINSUI stone still can remove a lot of steel, so I have to be very careful to keep the shape of the sword and remove as little as possible so that I can move onto the next step.
Click to Enlarge Image
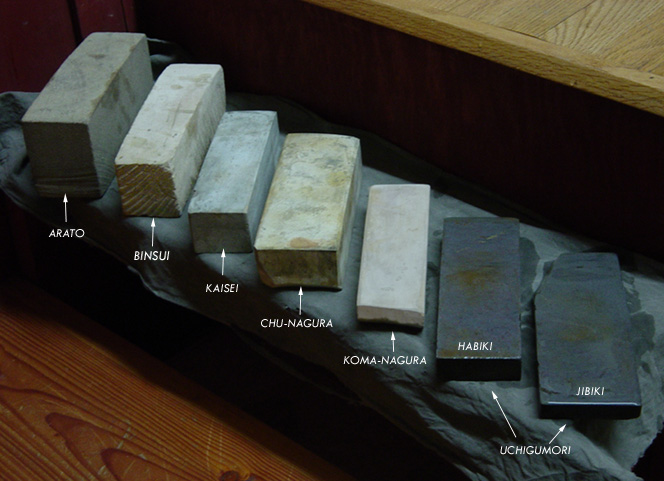
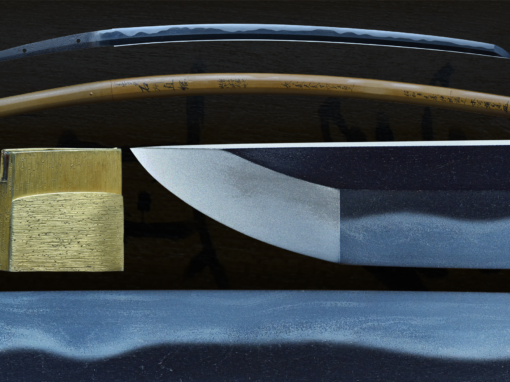
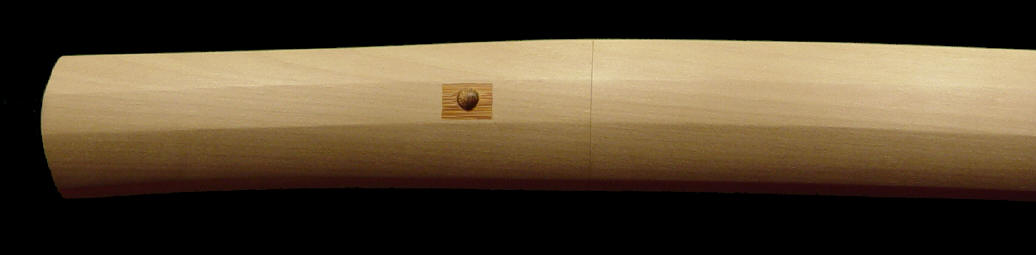
Next is the KAISAEI stone, again changing the angle and removing the scratches left by the BINSUI stone. After KAISAEI comes the CHU-NAGURA stone and then the KOMA-NAGURA stone. At the KOMA-NAGURA stage, the sword is starting to show the Hamon. This sword has a very nice Hamon that is typical of this smith. At this time a Habaki can be made for the newly polished sword afterwards a new Shirasaya is made for it. On this particular sword, the owner want to keep the original habaki and just have a Shirasaya made for it.
Click to Enlarge Image

Click to Enlarge Image
Click to Enlarge Image
After the Shirasaya is complete, I then start working with the UCHIGUMORI stones. This is a very critical stage because UCHIGUMORI come in many different grades and hardness. No one stone will work for every sword, so having many different stones is very helpful. Good quality UCHGUMORI are expensive just like swords. UCHIGUMORI can basically be categorized in two types. HABIKI and JIBIKI, one that is used for the Ha and the other for the Ji. At this stage a lot of work is also required to get a very good, even and clear Ji. It is impossible to finish a sword properly if this process isn’t done correctly.
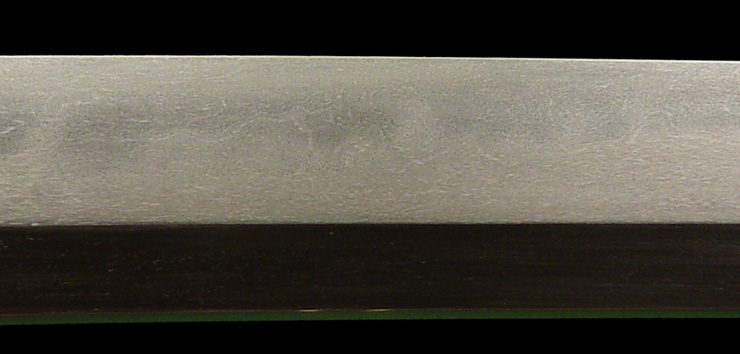
This picture shows what the Ji and the Hamon look like after finishing with the Uchigumori stone.
Click to Enlarge Image
At this point the foundation work on this sword is done and I prepare for the finish polish.
Click to Enlarge Image
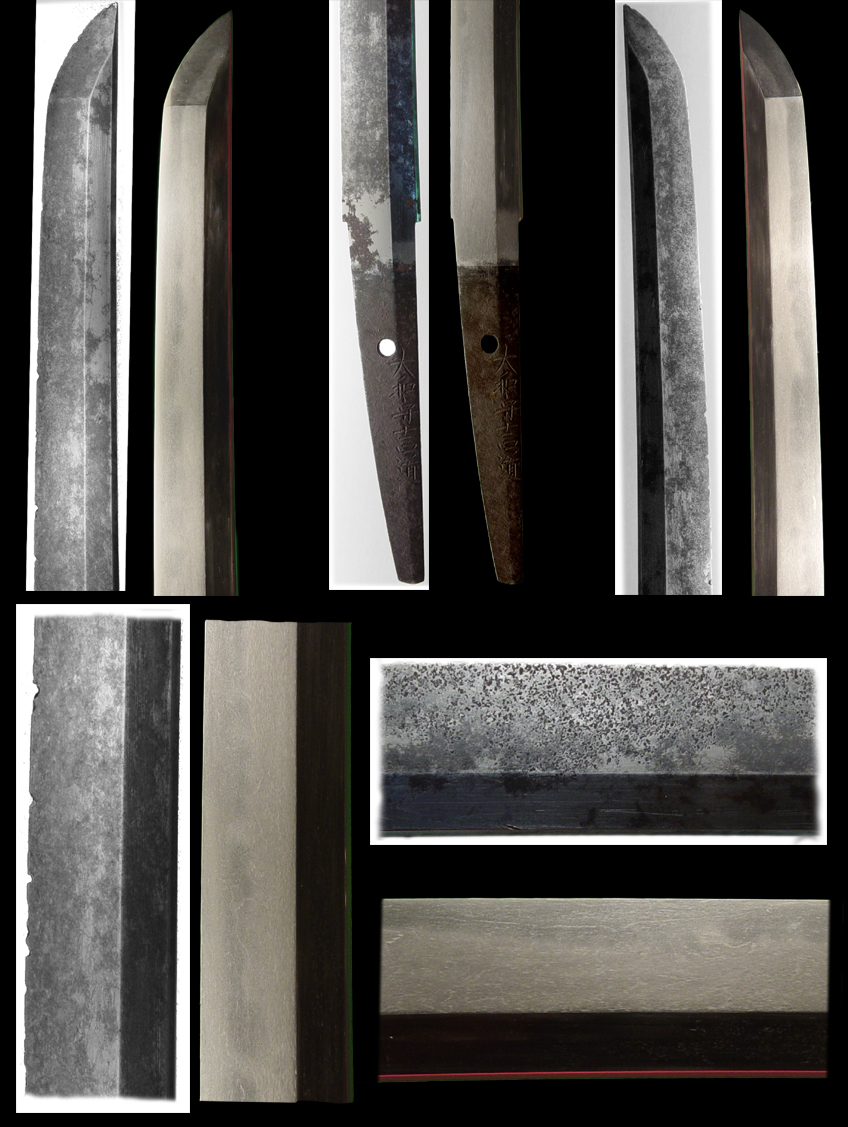
We have a sword that has a good shape now, no chips and no rust. This is the canvas that I will apply the finish to. All the geometry is crisp and the only scratches left on the blade are from the Uchigumori stone. The Uchigumori scratches are actually smaller than the Hada and steel surface itself. That’s why the Hada now is visible and the surface is a matt finish. Please take a good look at the photo below.
Click to Enlarge Image

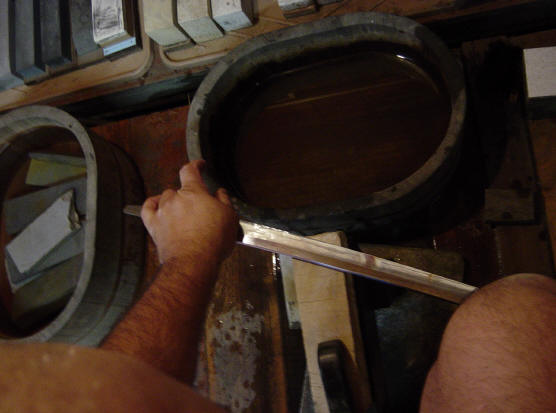
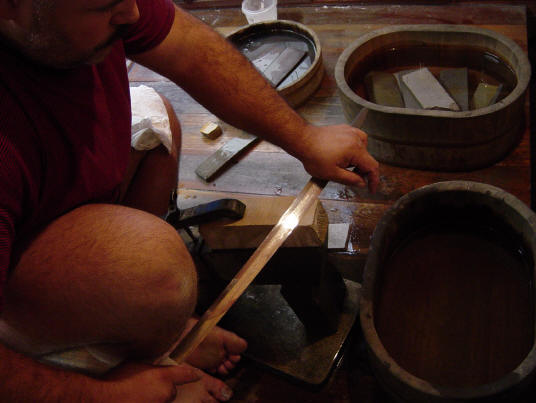
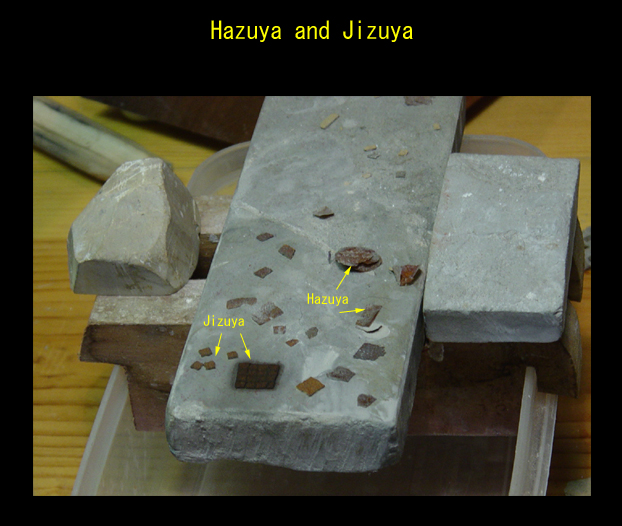
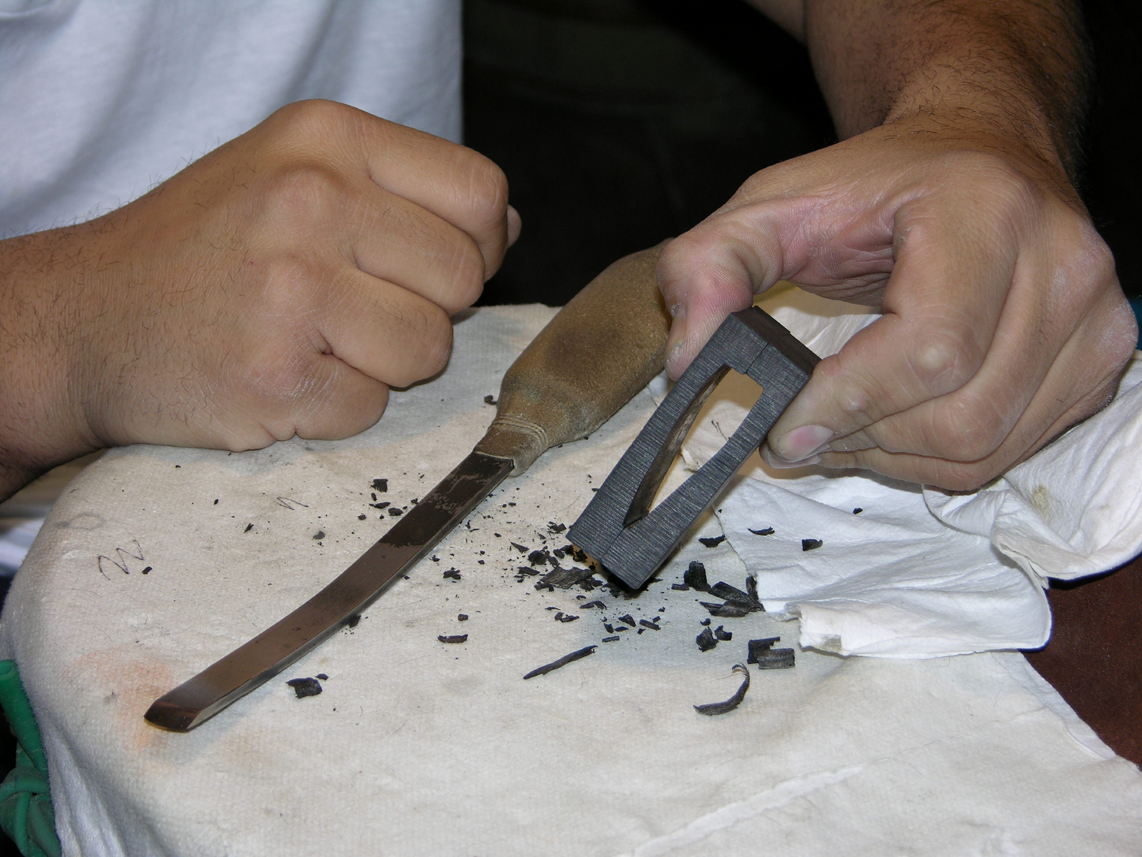
Now prepare the Hazuya and Jizuya stones. They are ground down to the correct thickness. Because the stones are so thin a layer of rice paper is applied with Urushi (lacquer) on one side. Note in this picture that they are all different colors. Each Hazuya and Jizuya is different from another, so selecting the correct one that matches the Jigane is very important. Some are harder, some are softer.
Click to Enlarge Image

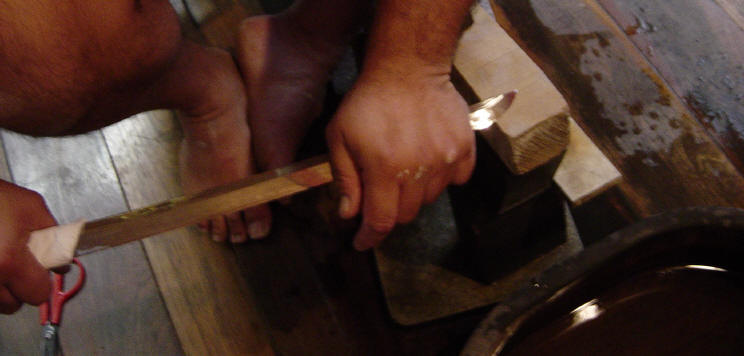
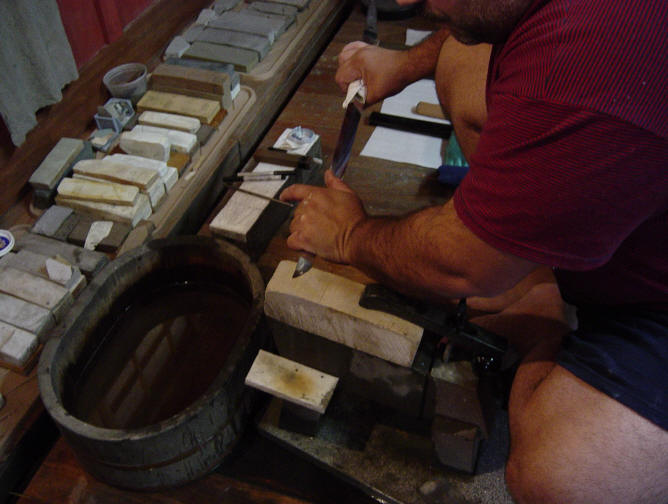
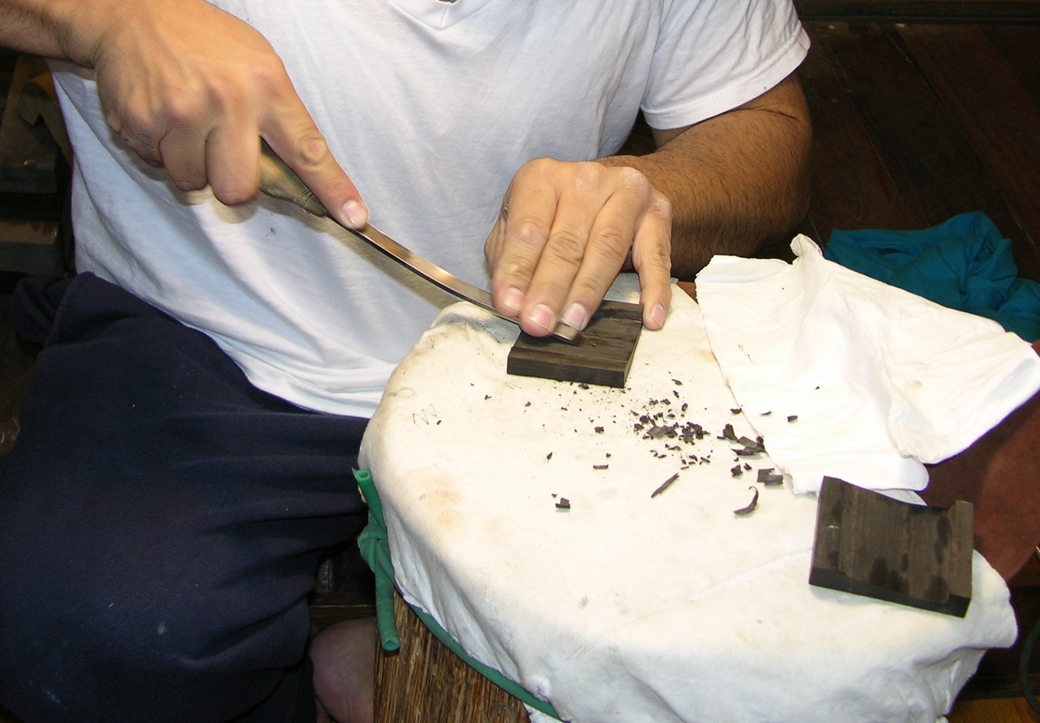
The Hazuya and Jizuya are selected and cut into small pieces. I then grind them down to the thickness that will work well on a particular sword.
Click to Enlarge Image
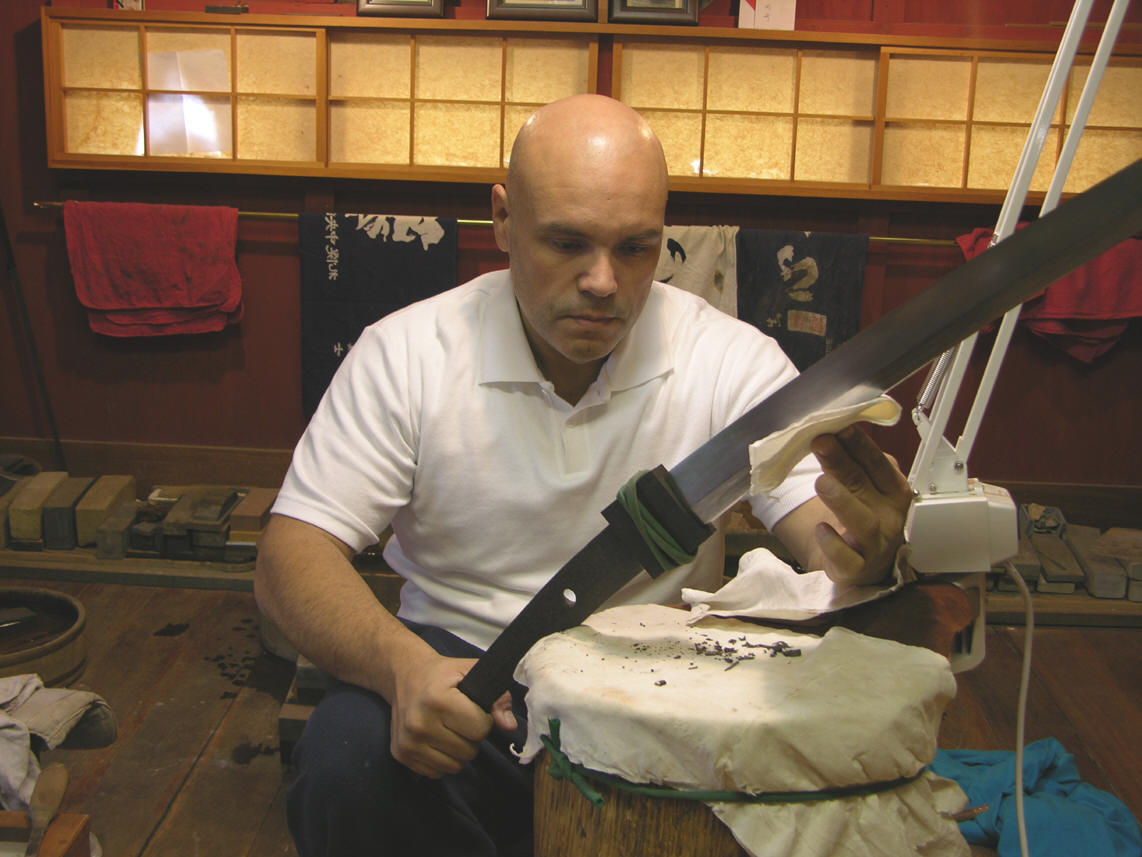
The first thing is to work on the Ha. It must be made smooth and any scratches left from the Ujigumori must be removed. Generally I don’t leave any scratches from the Uchgumori stone, but this step does even out the Ha and whitens it at the same time.
Click to Enlarge Image
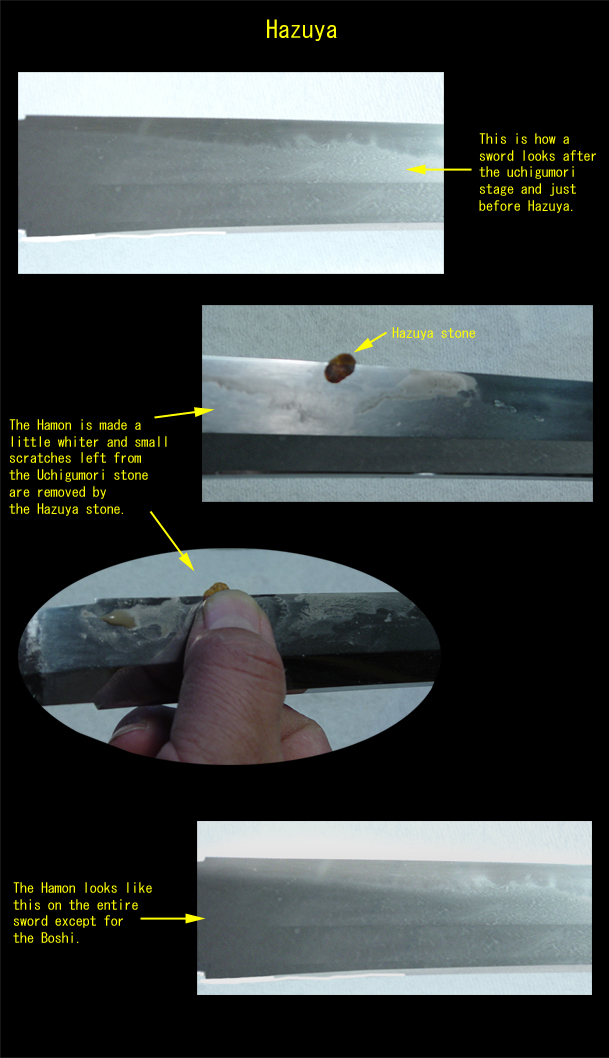
Next is the Jizuya, this will clear the Jigane further. Done correctly, and selecting the best stone will be critical for a beautiful Jigane.
Click to Enlarge Image

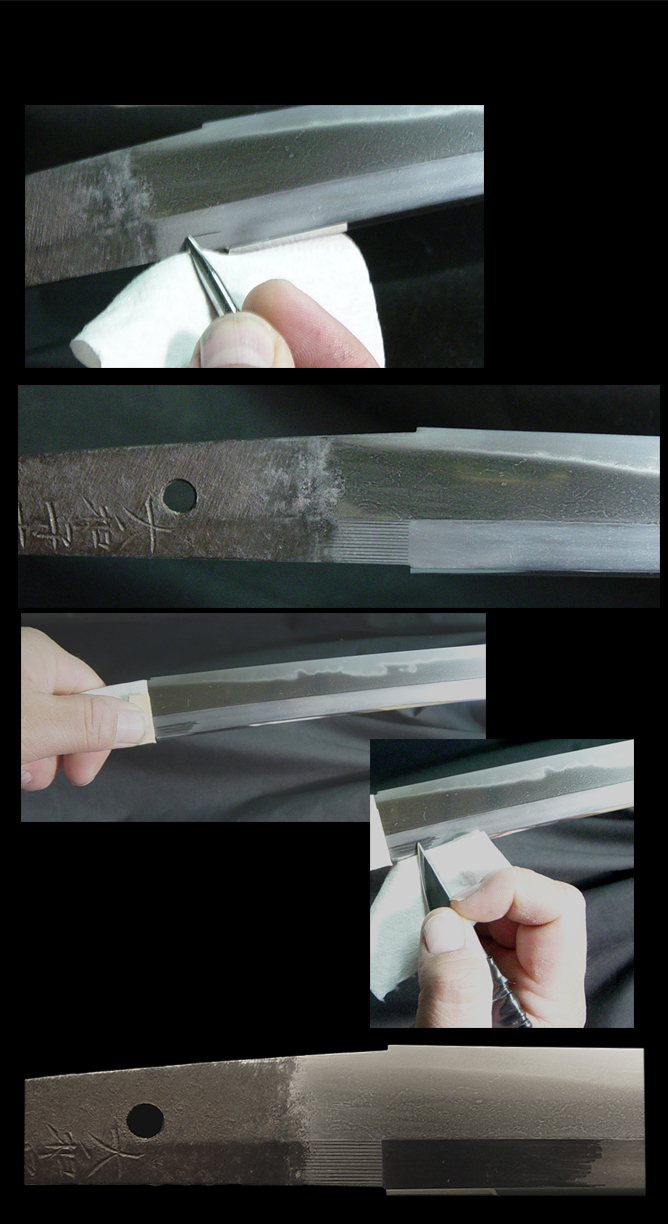
Nugui is a iron oxide that is rubbed into the ji-hada. This process darkens the hada even further.
Click to Enlarge Image

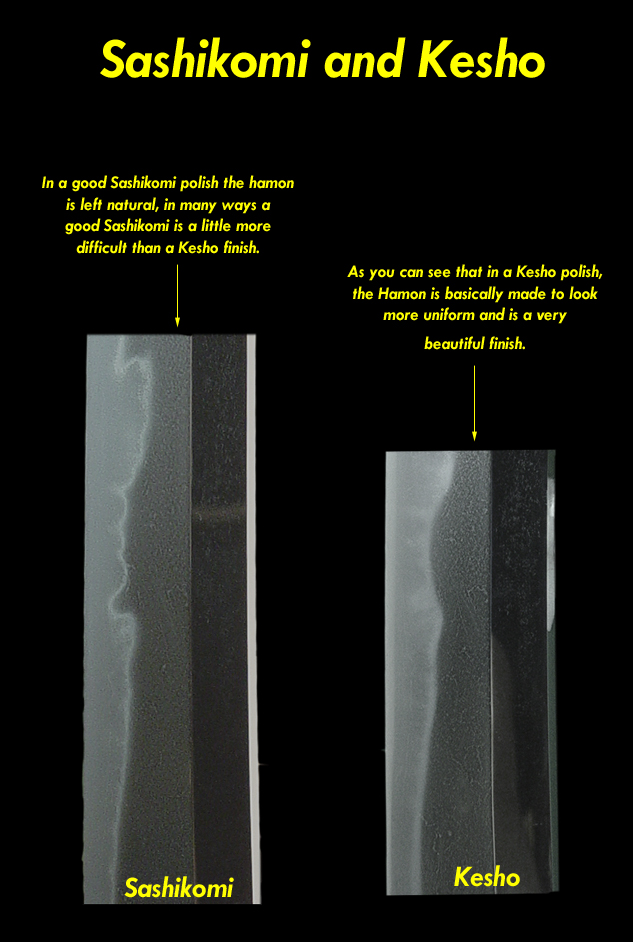
I have decided that this Shinto sword is very healthy, and the Hamon is very beautiful, so I will polish it in a Sashikomi style. In the Sashikomi style a different Nugui is used, and some other techniques are employed to finishing the Jihada and to create a beautiful contrast between the Jihada and the Hamon. I will also demonstrate how the Kesho finish is done also.
The Hadori process is done for a Kesho polish. The picture below shows how the Hadori line is created.
Click to Enlarge Image
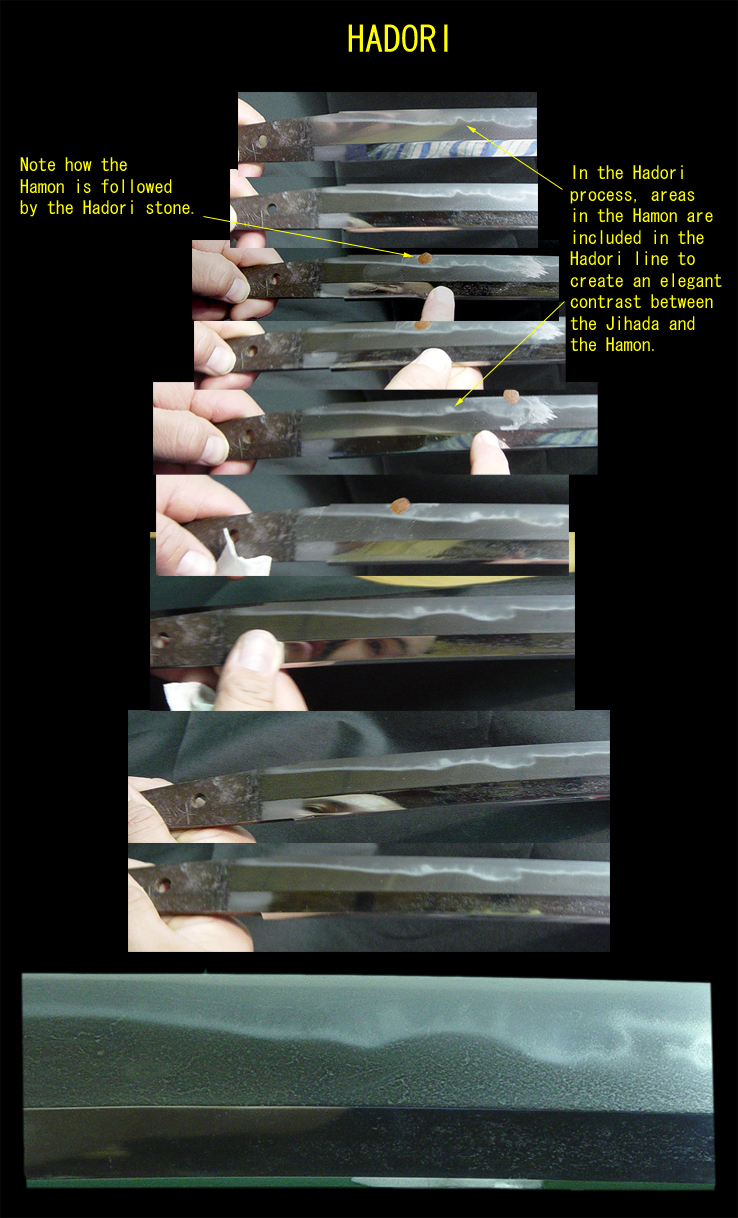
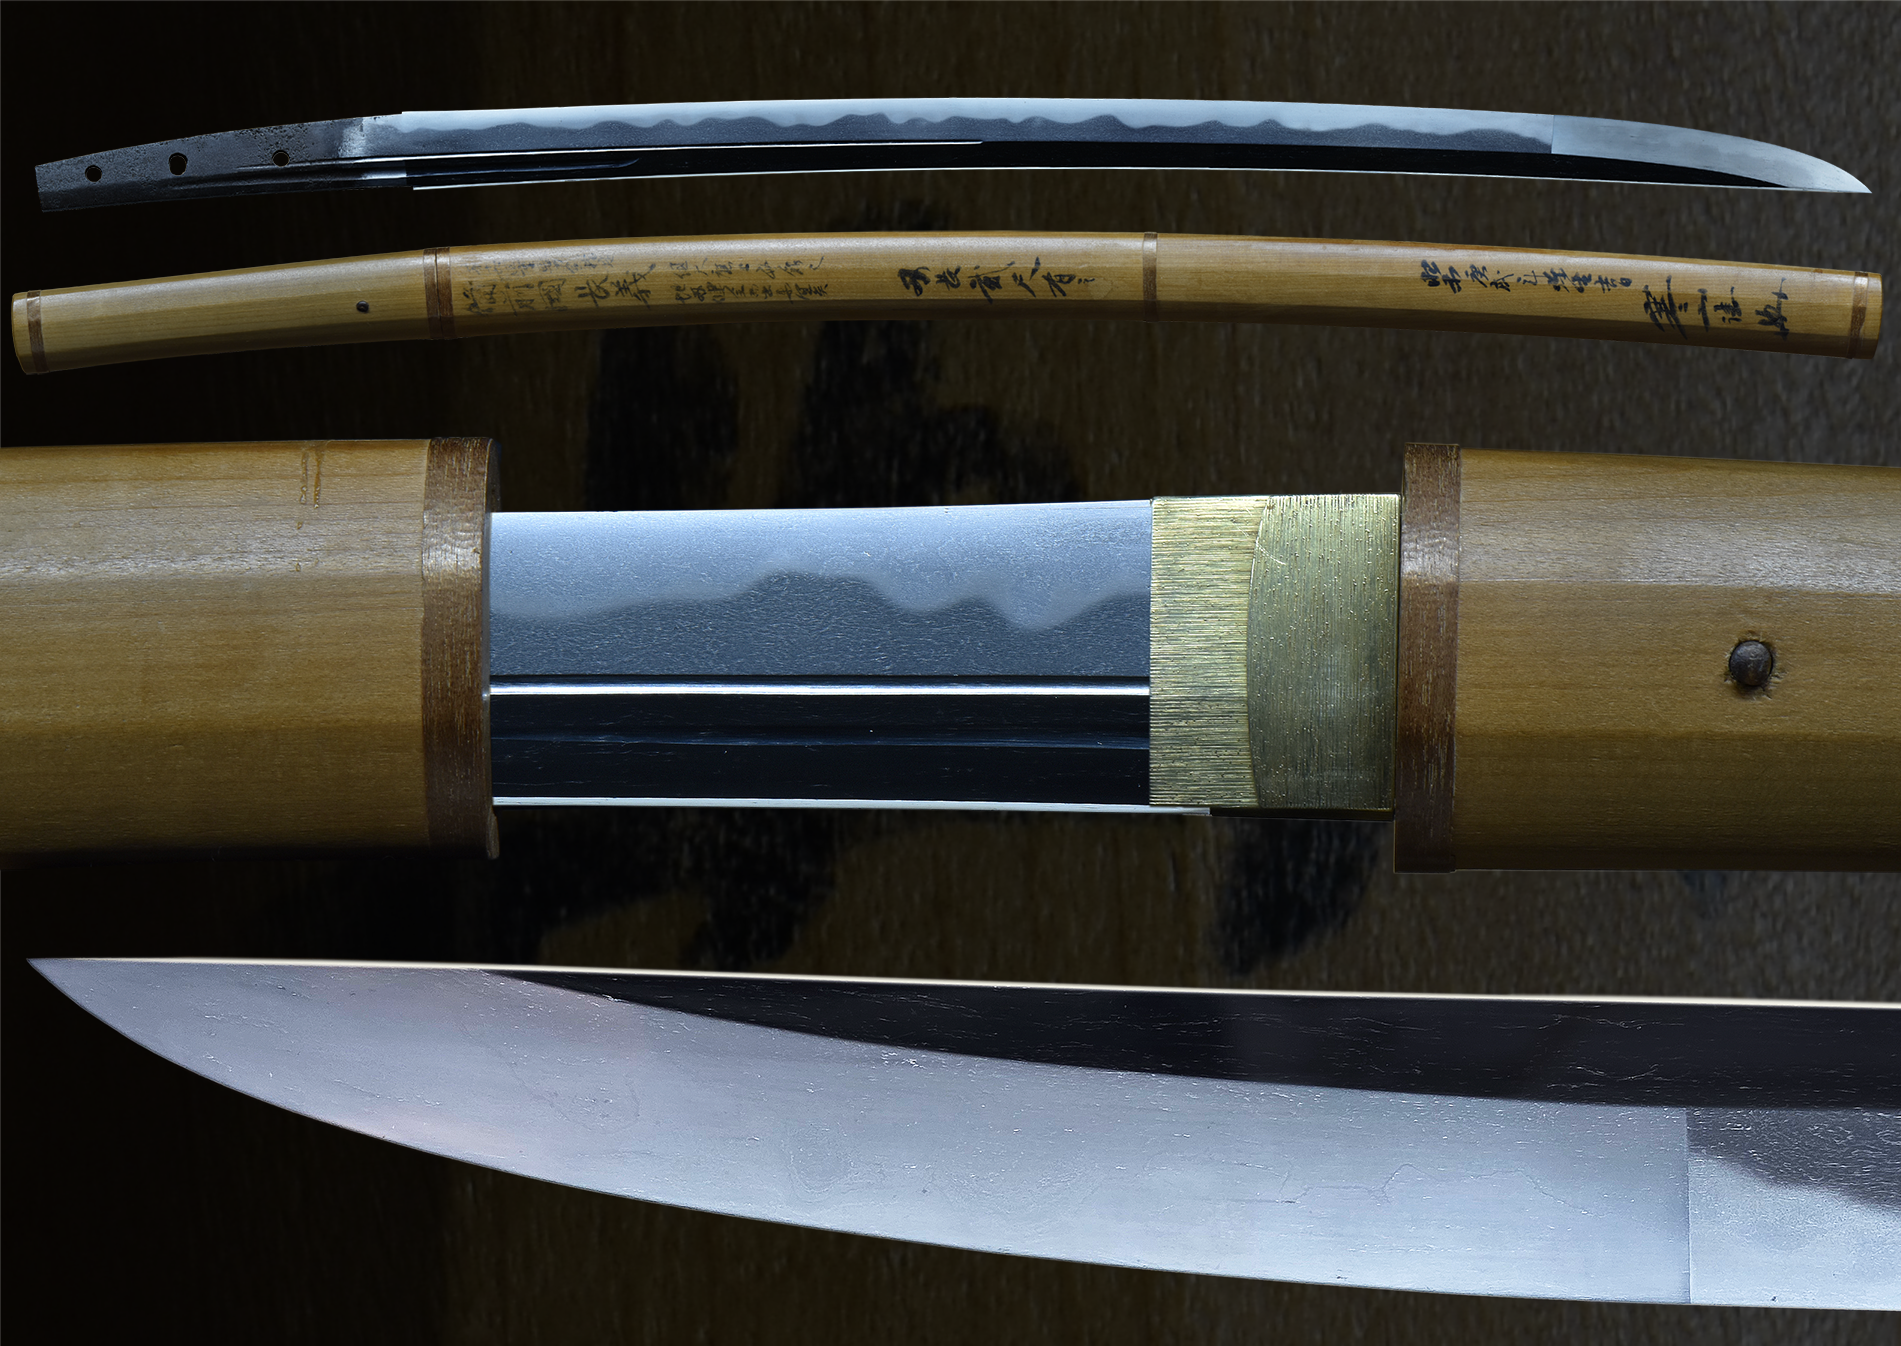
Now that the sword has been finished in a Sashikomi style, you can compare the difference in the picture below. I have also burnished the Shinogi-ji in this picture to show what a finished sword should look like.
Click to Enlarge Image
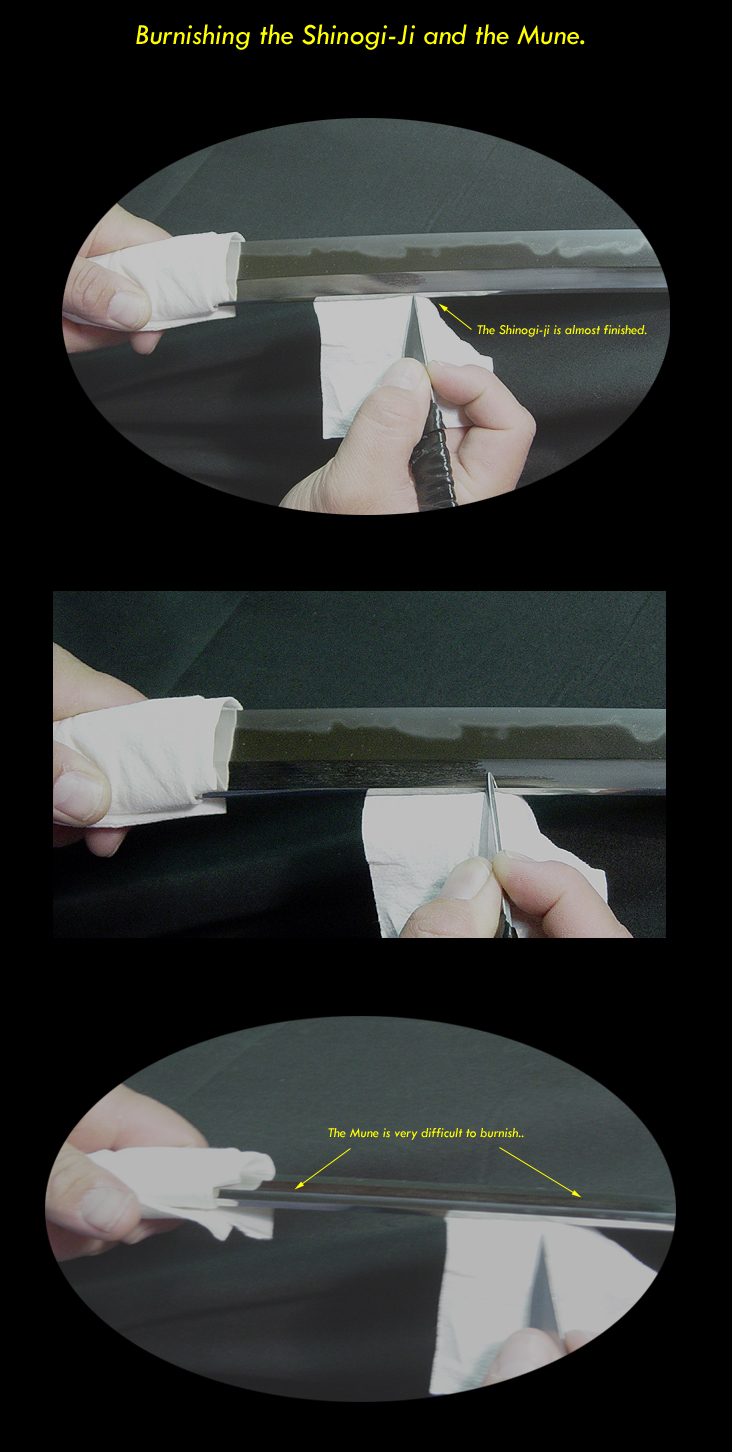
Migaki-bo (burnishing needles) are used to polish the Shinogi-ji and Mune of the sword. They also are used to leave a polishers mark under the Habaki and on the Mune by the Kissaki.
First the Polishers marks are made.
Click to Enlarge Image
Click to Enlarge Image

Next, the Shinogi-ji and Mune are fully Burnished. When studying a sword look carefully at the Shinogi-ji., a Koto sword can not be burnished so shiny that it looks like a Gendai-to. Also the Shinogi-ji should show the Hada within it on many swords.
Click to Enlarge Image
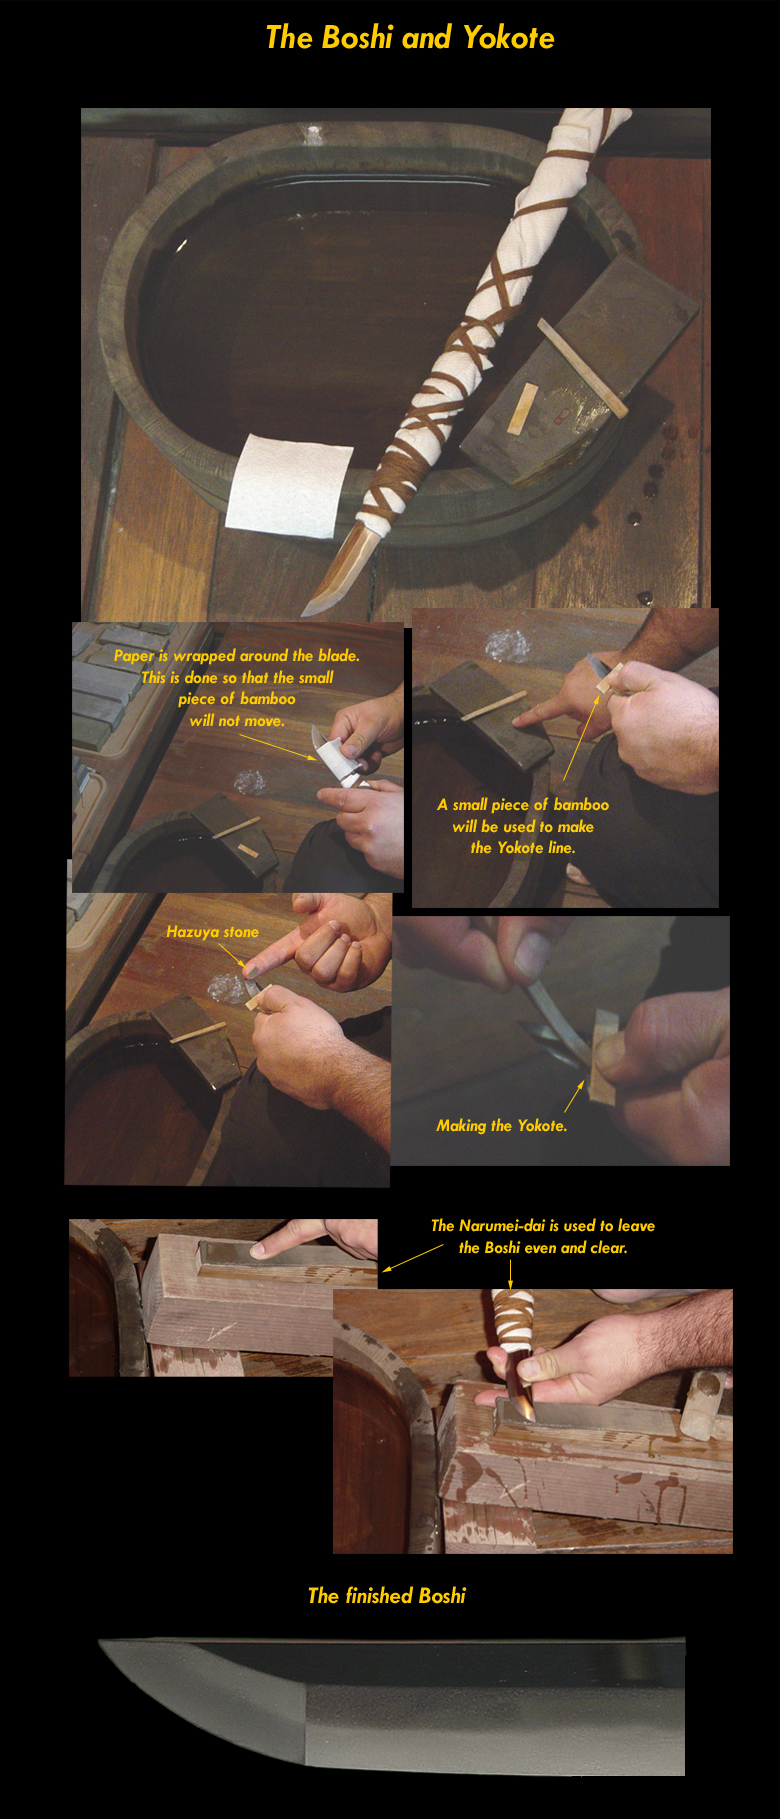
The sword is almost complete after all the burnishing is done. The only thing left is the Boshi. The Boshi is done by first making the Yokote line. Placement of this line has already been established in the foundation work. Now the Yokote is refined even further, and a clear line is made. After the yokote line is made the next step is to polish the rest of the boshi. In this step the boshi is made to match the color of the Yokote line and the entire Boshi is made clear and even by the Uchigumori stone. No scratches should be left on the boshi.
Click to Enlarge Image
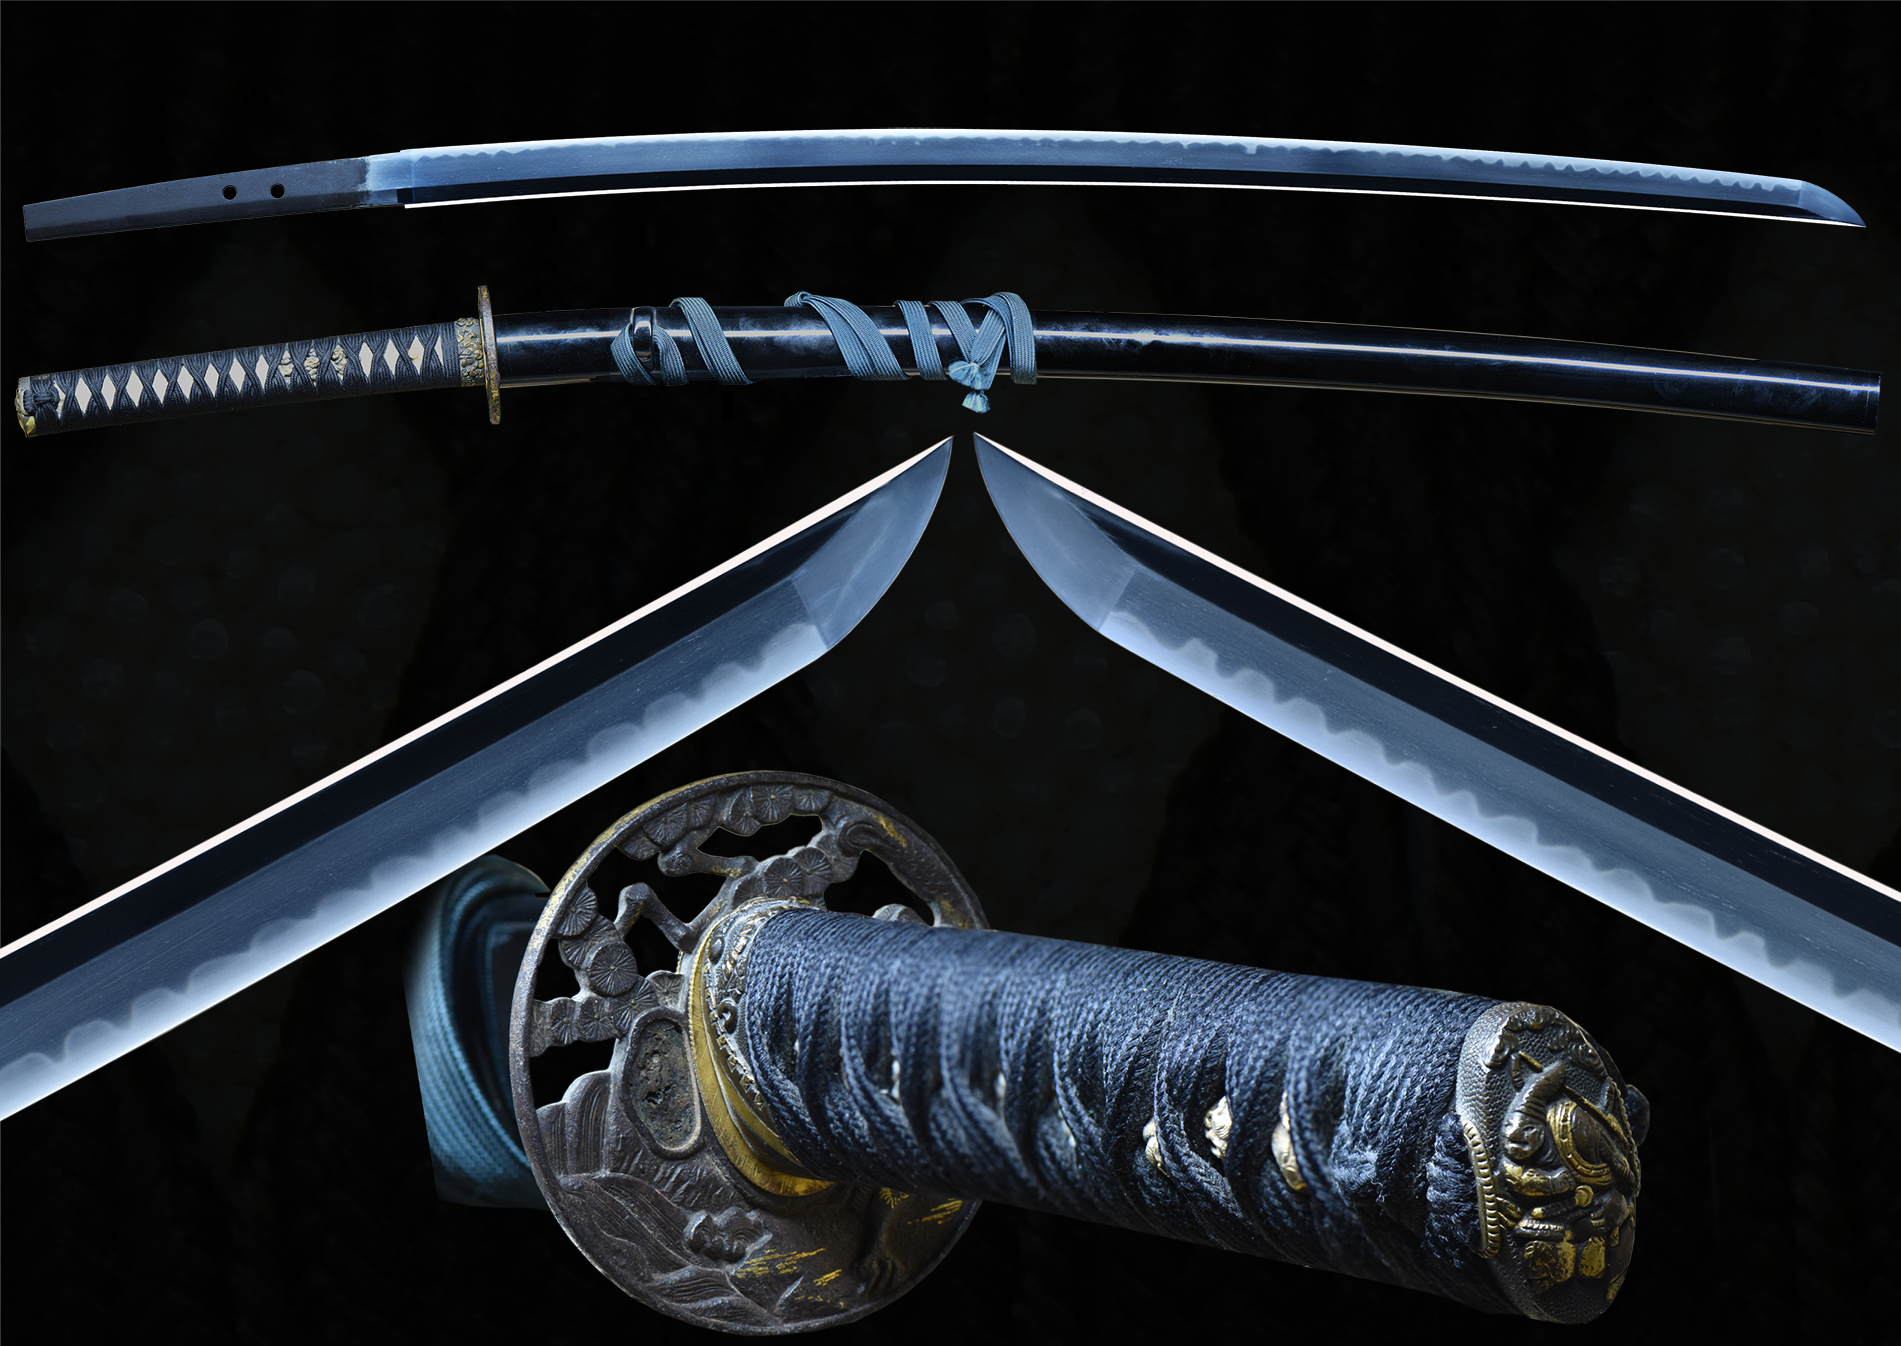
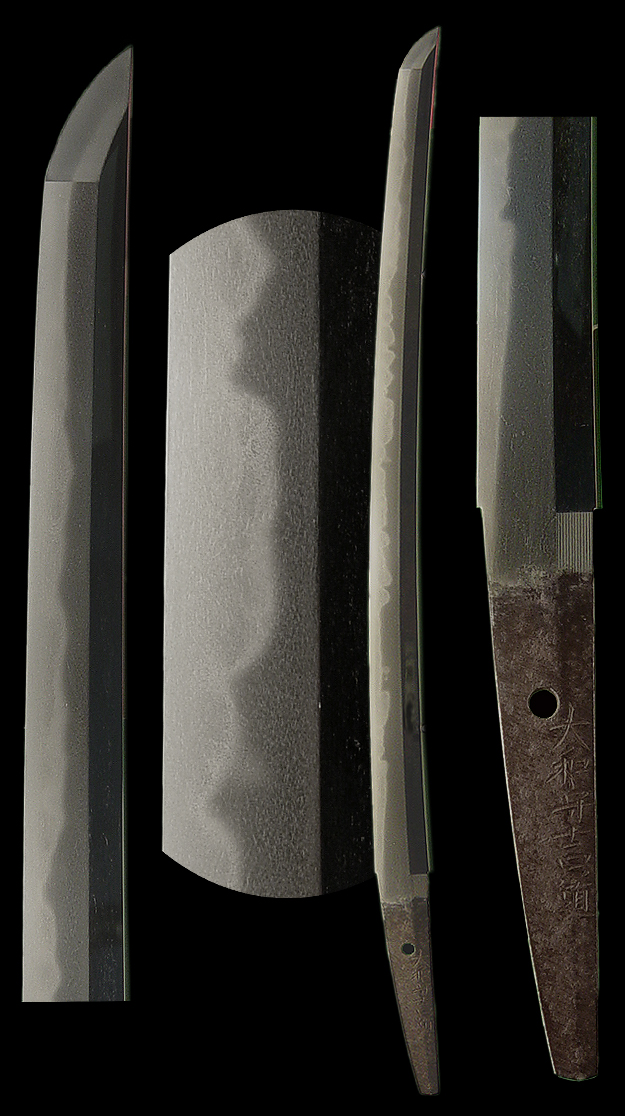
This Yoshimichi is finally done. A lot of time and effort went into polishing this sword, but now it is a beautiful sword to look at and own. Maintaining the sword in good condition is much easier now that is has no rust on it and a light amount of clove oil is left on the surface of the blade to preserve its fine polish. Compare in the picture below of the sword we started with, and the completed Yoshimichi.
Click to Enlarge Image
Click to Enlarge Image
I hope that this has been enjoyable for you to read. I have enjoyed working on this fine sword and hope that this section of my site has added a little more to your understanding of the NIHON TO.
Polishing & Restoration Process Of A Very Large Sword
(This sword has a Nagasa of 40″long. The with at the habaki area is about 2-1/2″ wide)
Back to Top
This sword was badly in need of a polish. After removing rust and some chips I repaired the kissaki that was broken.
This picture to right shows the sword ready for final shiage-togi (finishing polish).
Click to Enlarge Image

These are some pictures during the first steps of polishing.
Click to Enlarge Image
Click to Enlarge Image
Click to Enlarge Image
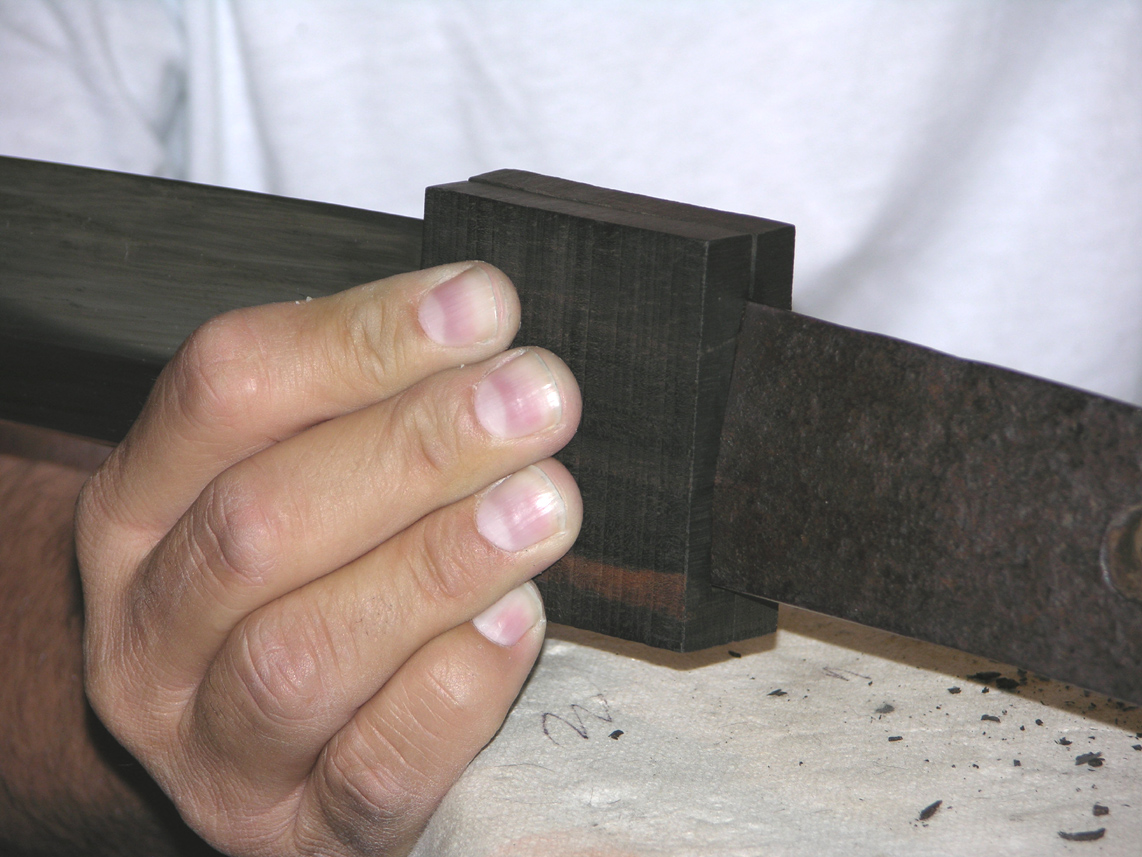
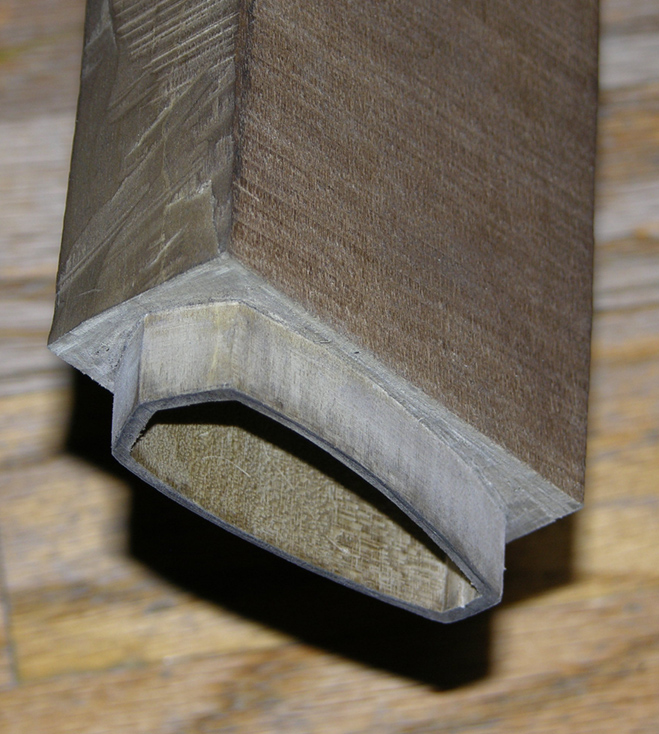
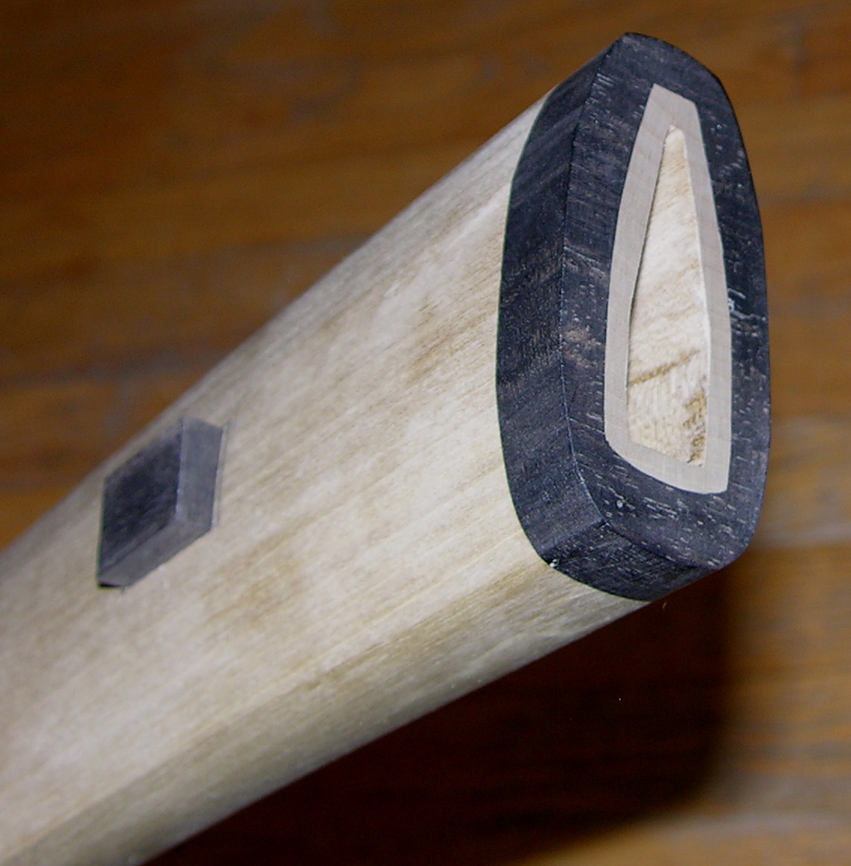
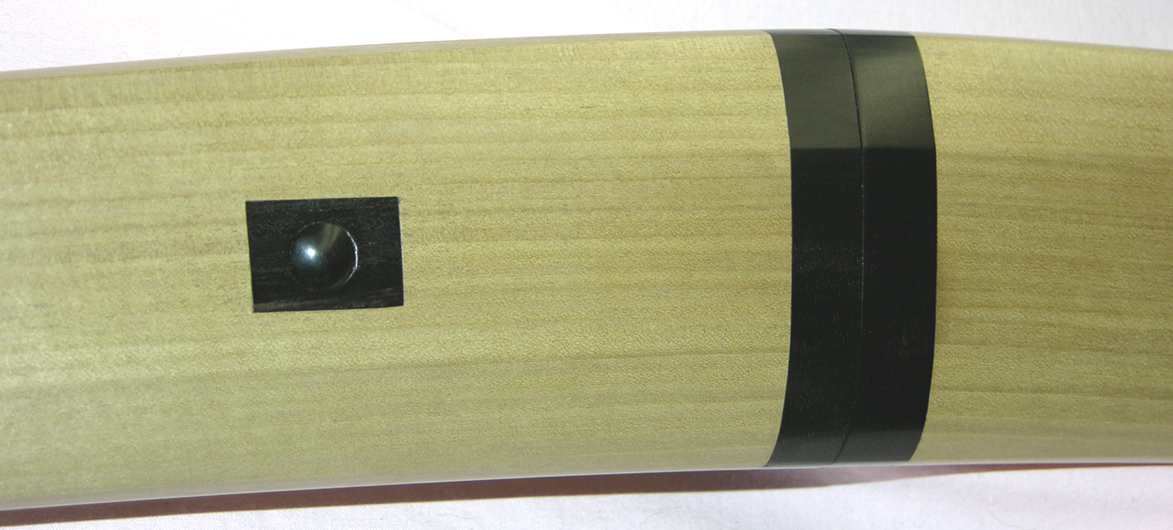
At this point I am making a wooden habaki in solid Ebony for this sword. I will do the final polish of this sword after the habaki and shirasaya is completed. I have not seen any other craftsmen using ebony for habaki. My clients like the end result after I make matching inlays in the shirasaya handle and make the mekugi in ebony also.
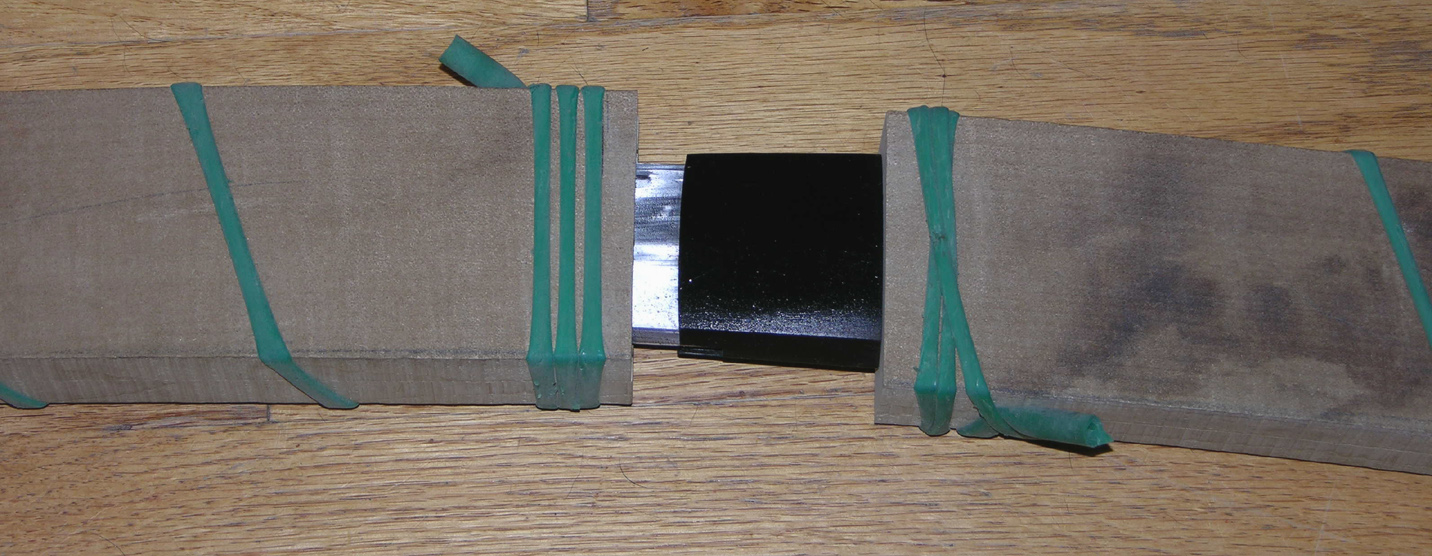
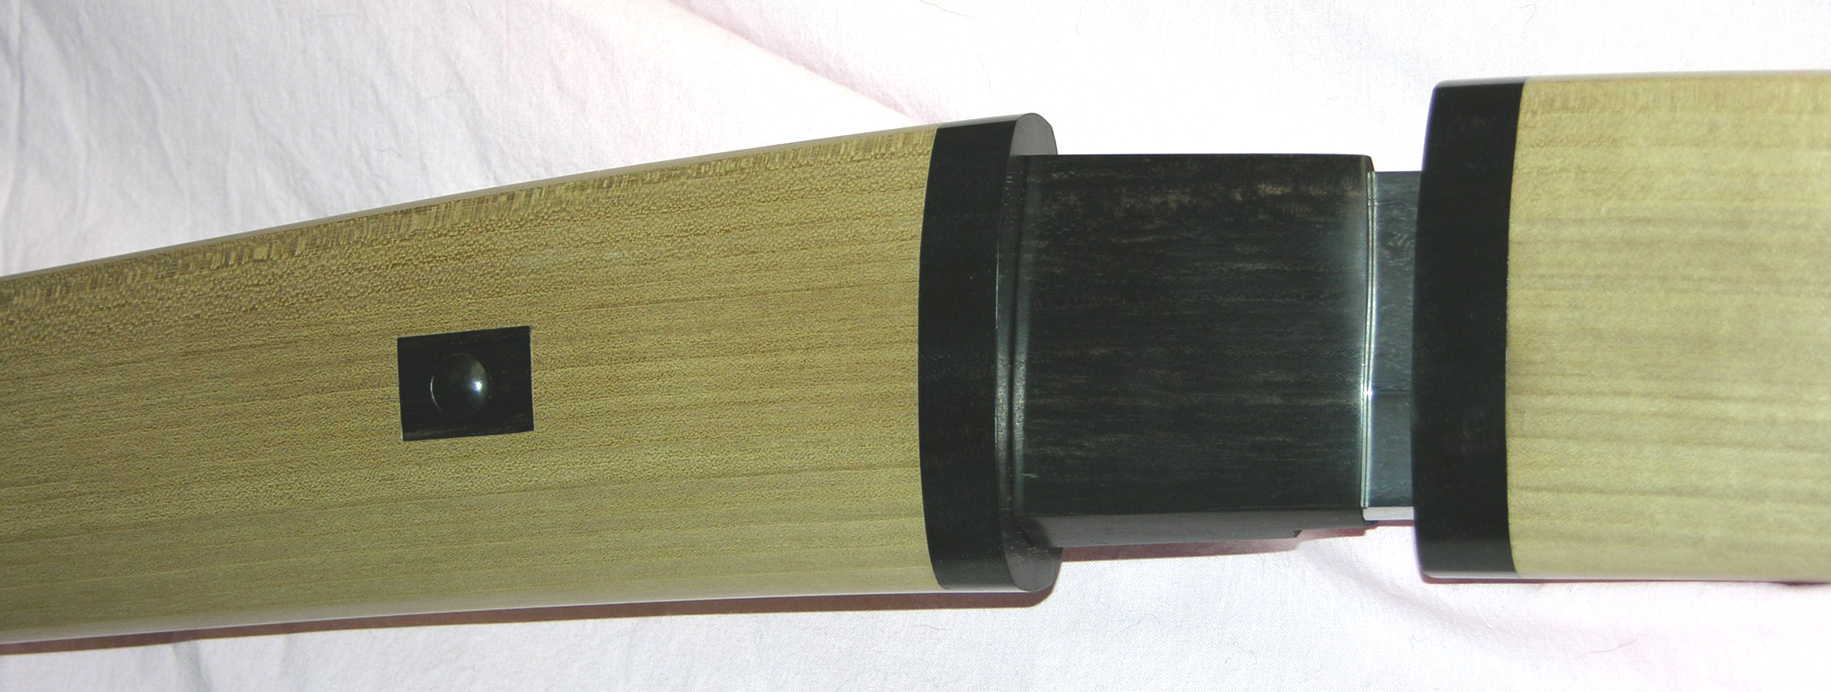
The habaki is being fitted to the sword.
Click to Enlarge Image
Click to Enlarge Image
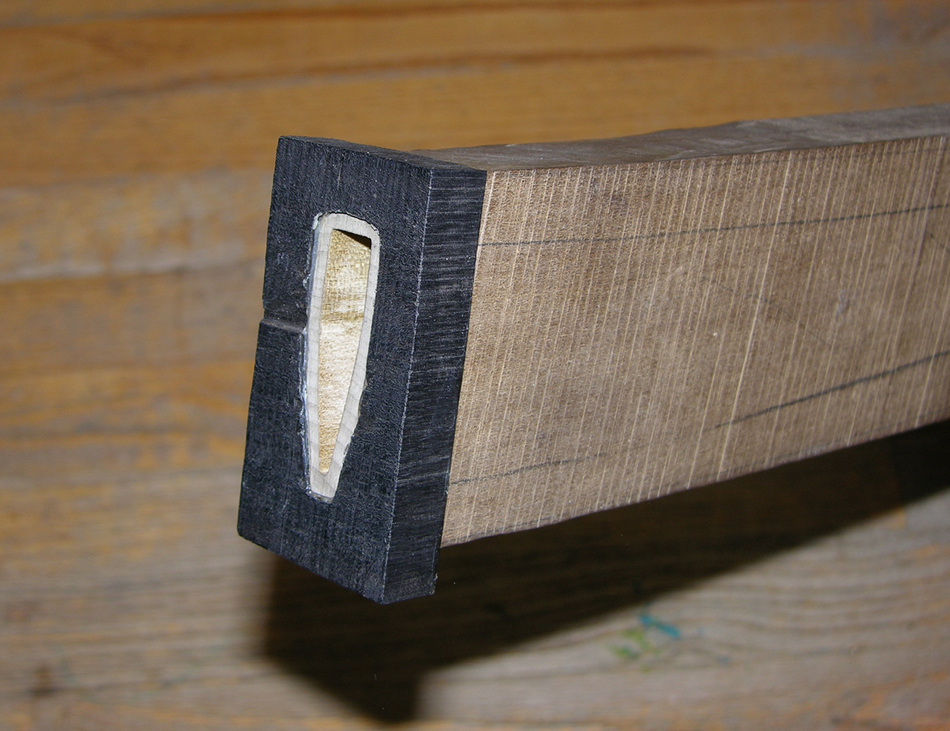
The habaki is ready to be glued together with a special glue that I like to use for ebony.
Click to Enlarge Image
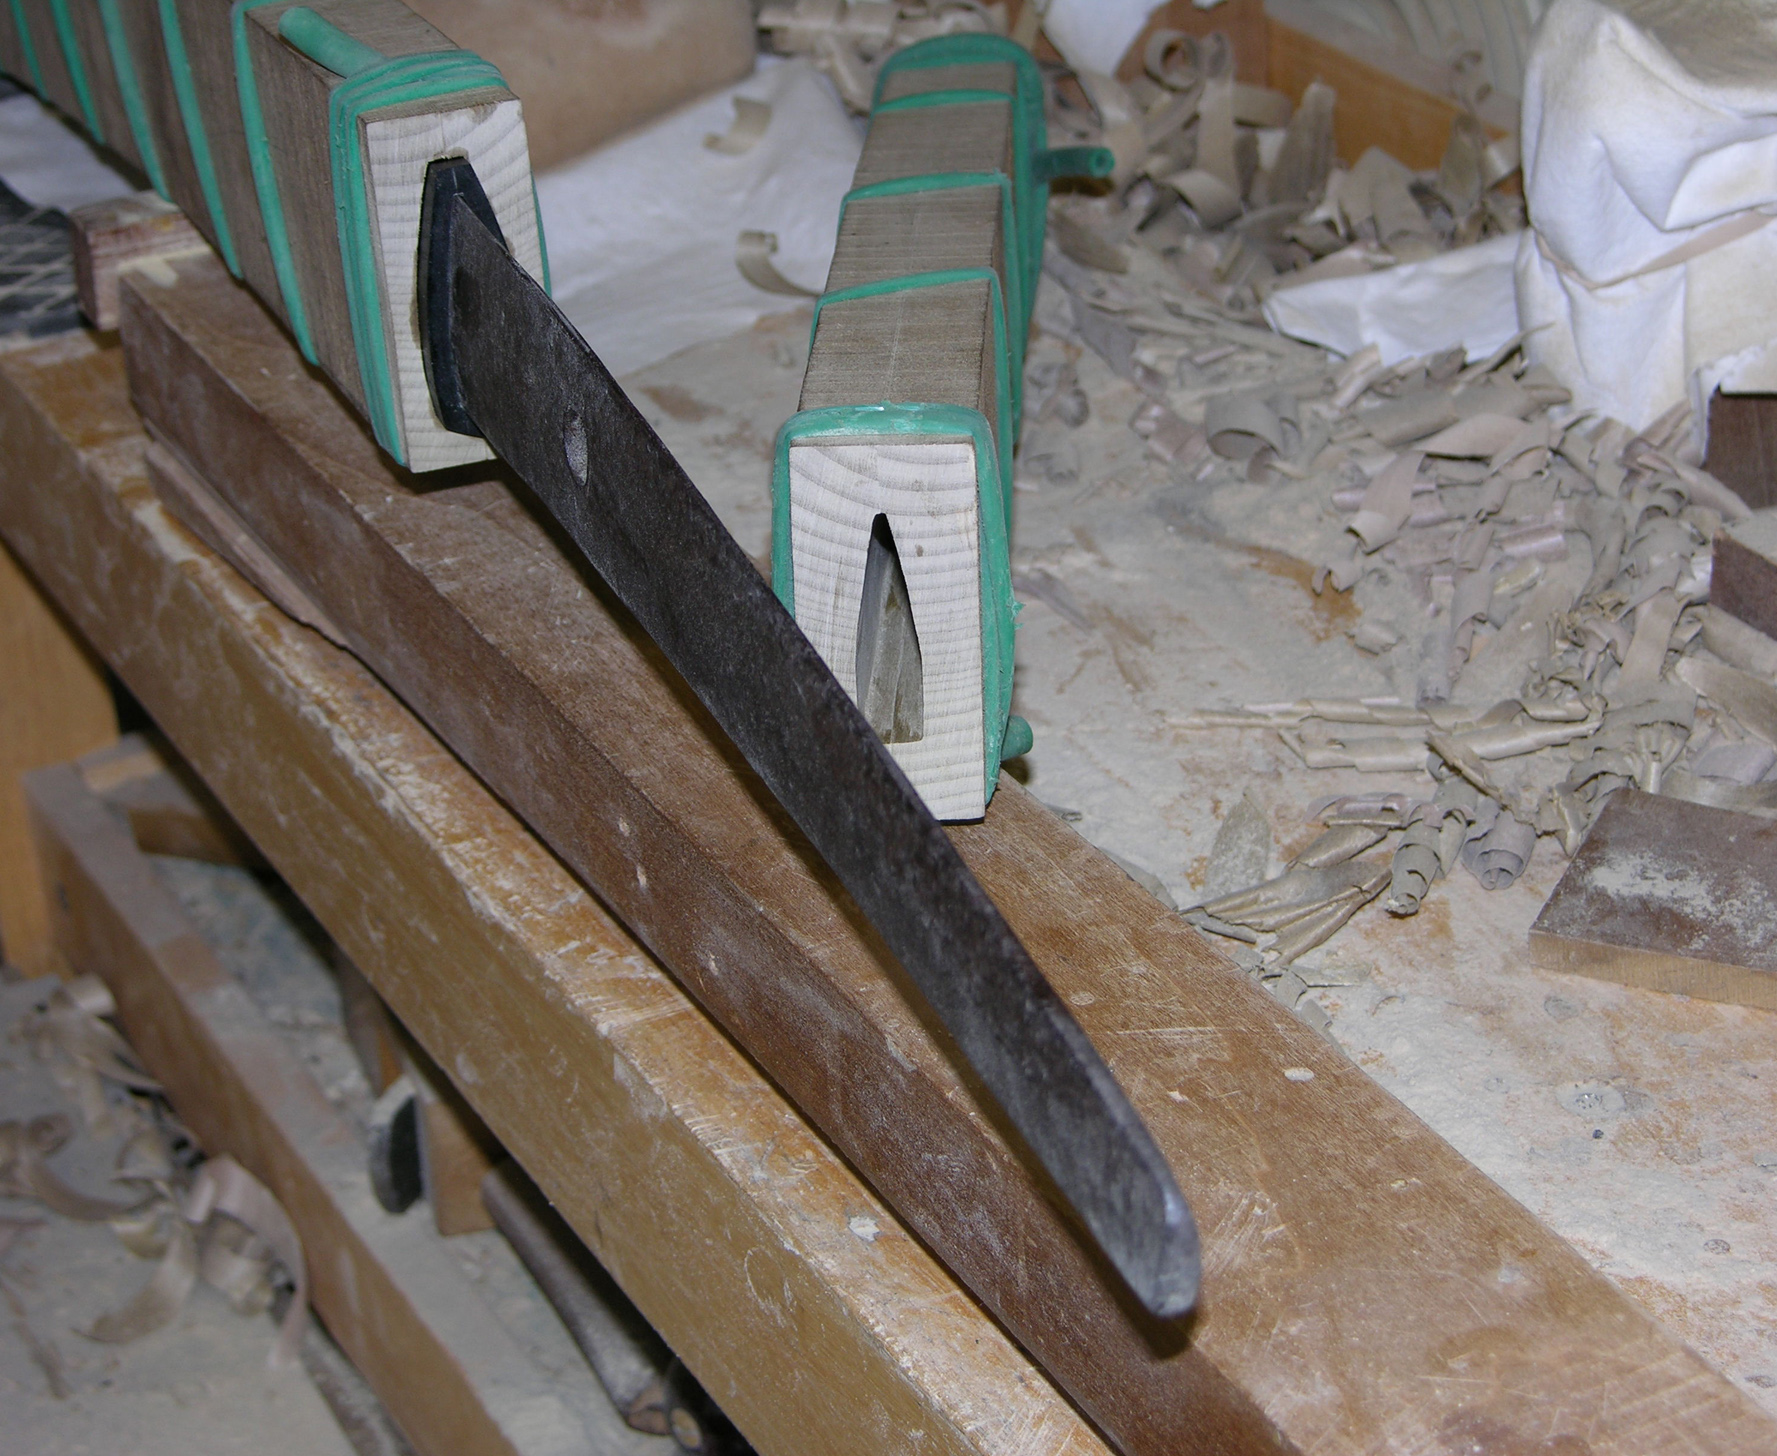
After the glue dries I can then shape the habaki.
Click to Enlarge Image
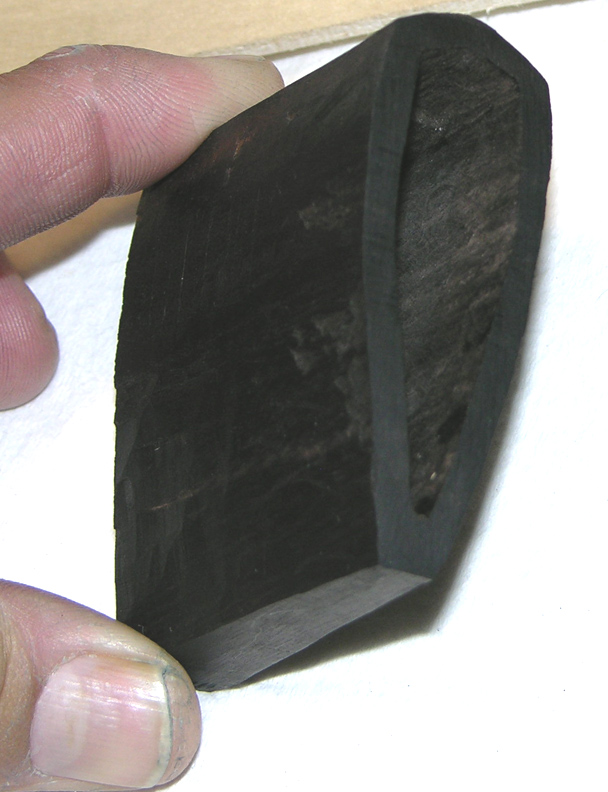
This is the final shape of the habaki before it is polished and given a fine finish. Shirasaya and habaki will be polished together at the end.
Click to Enlarge Image
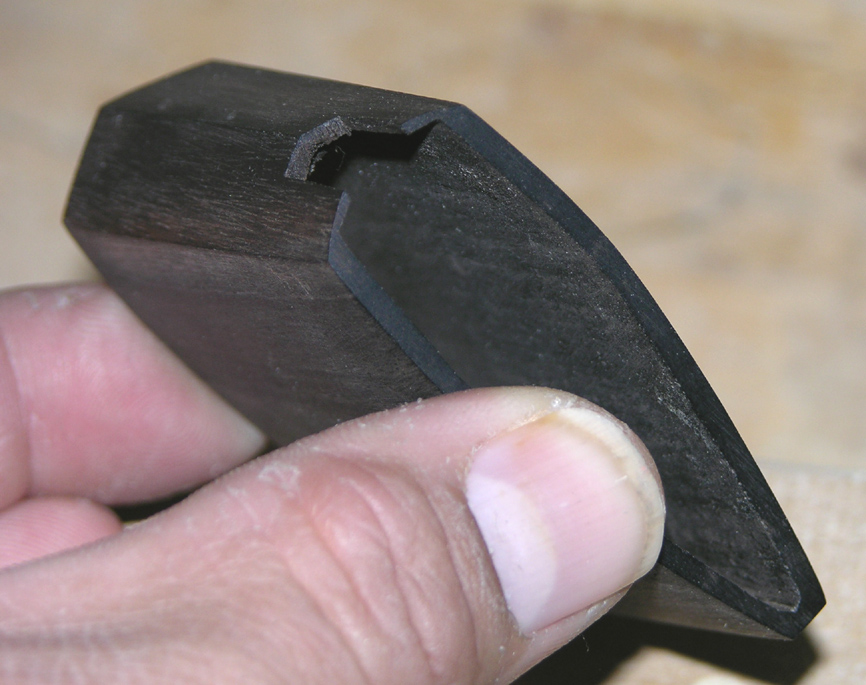
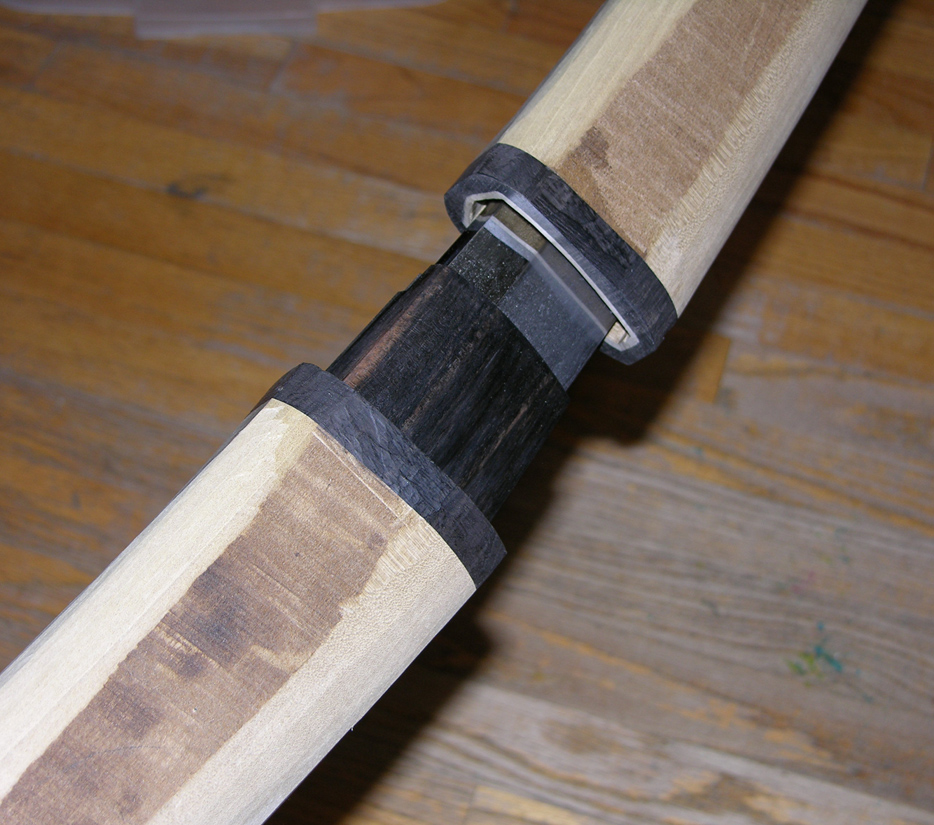
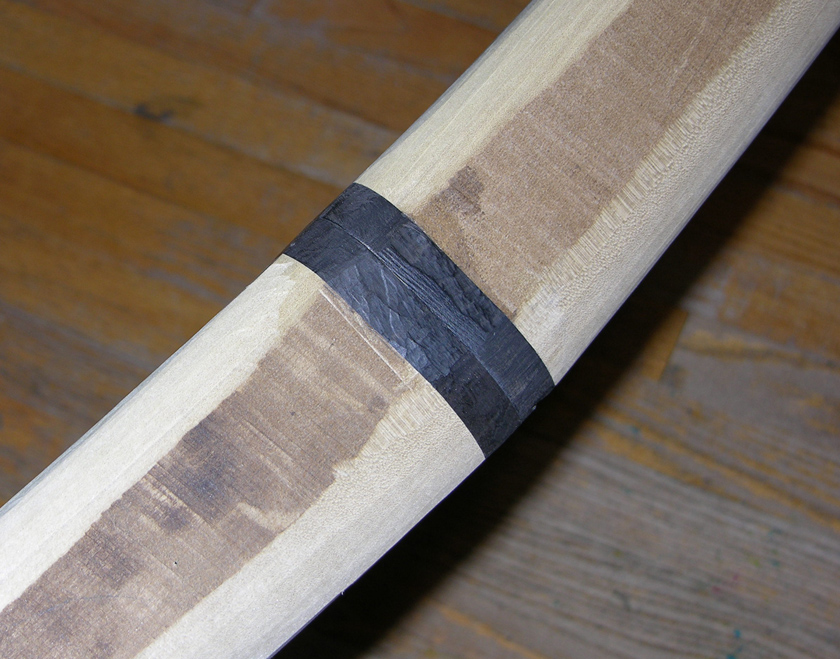
This is the completed ebony habaki.
Click to Enlarge Image

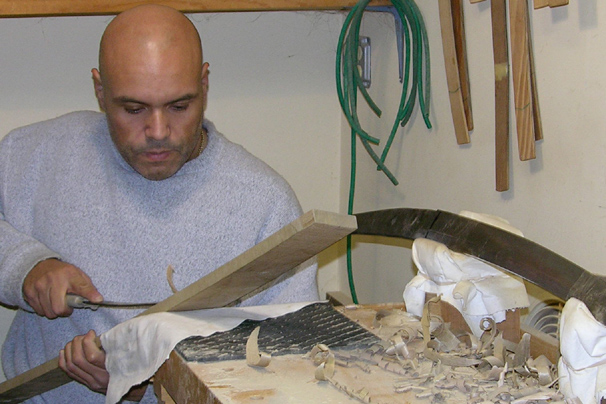
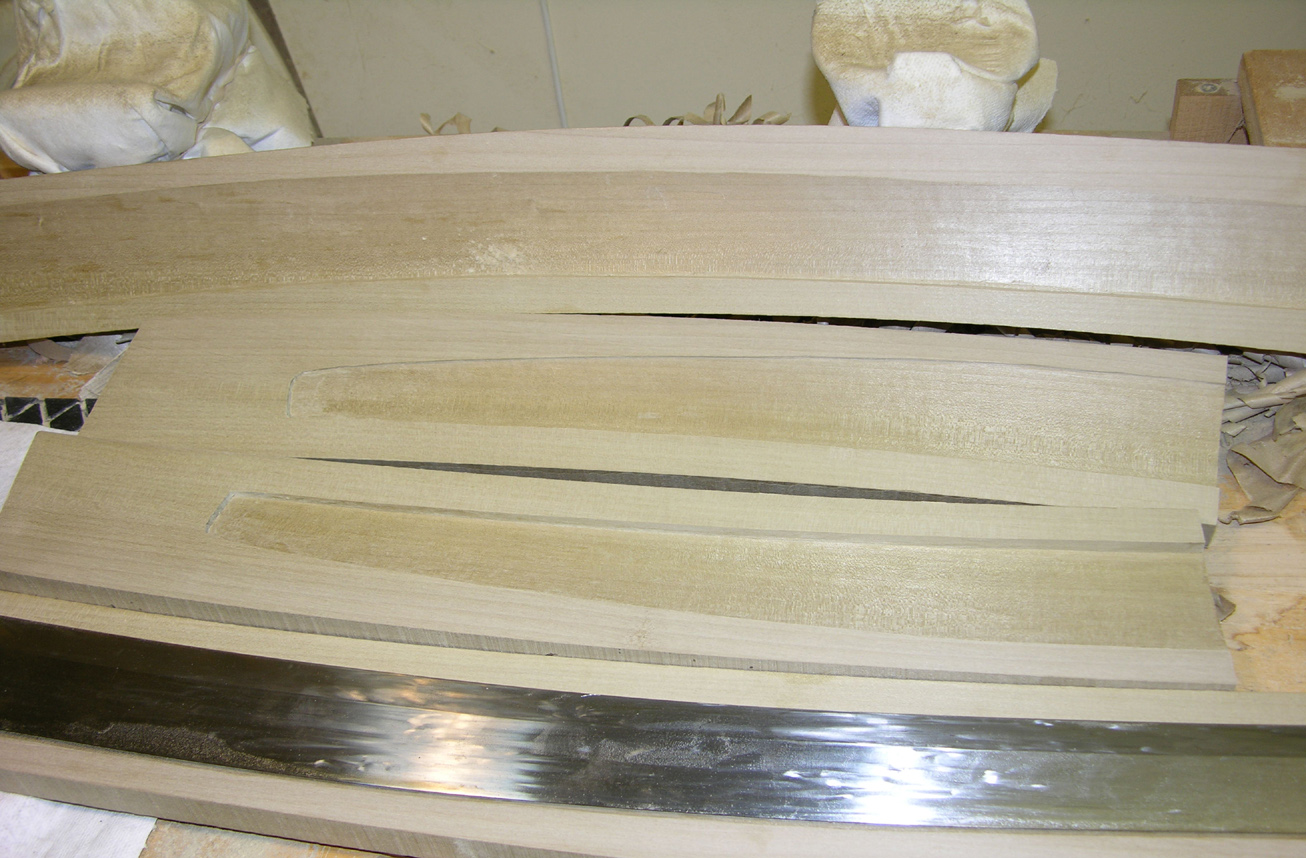
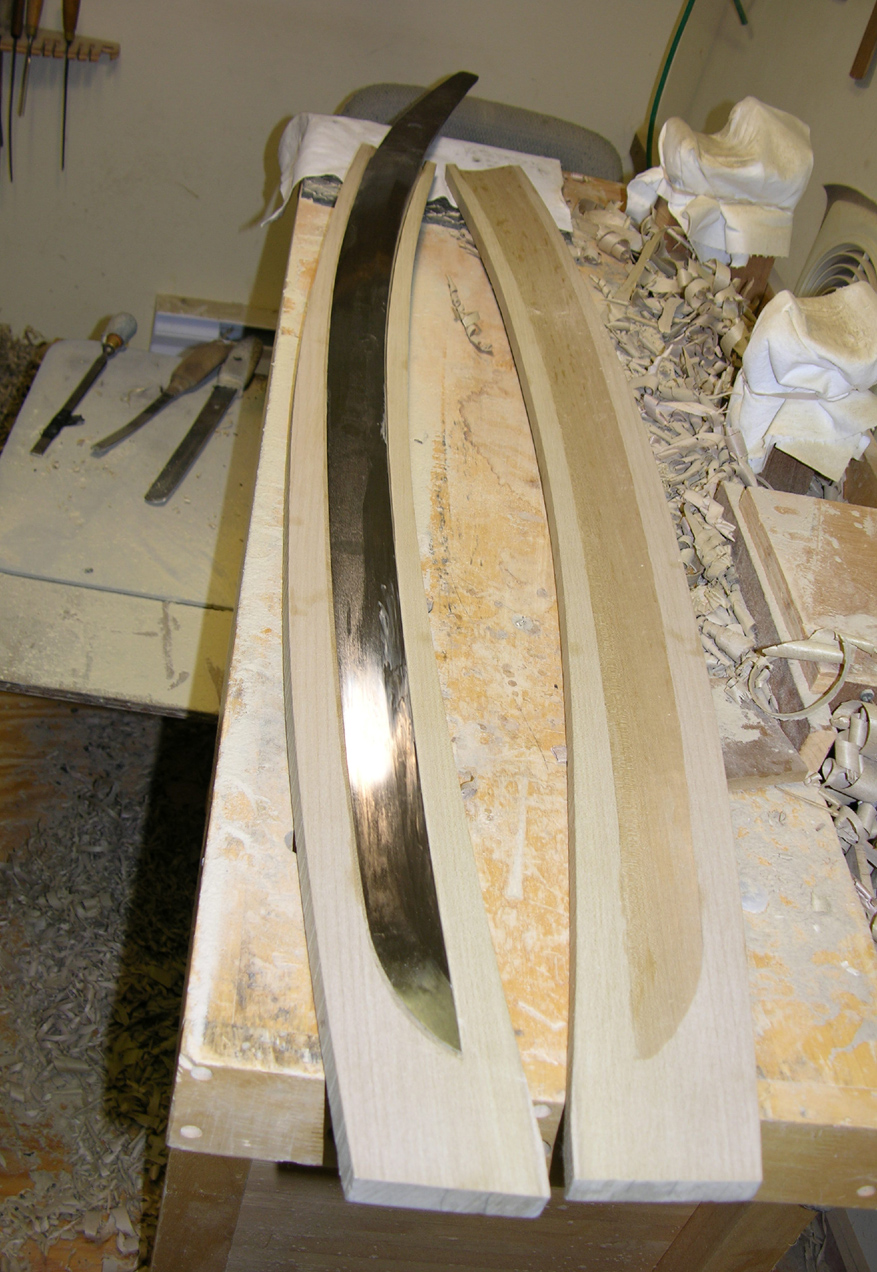
The Shirasaya wood is so large that it is very difficult to carve out the inside in long even strokes. Slowly the wood is carved carefully so that the sword doesn’t touch the wood on the inside when it is glued together but the sword shouldn’t rattle either inside the saya. Also consideration has to be given to the way wood changes with the climate. The fit has to be very good to protect this sword and its new polish.
Click to Enlarge Image

Click to Enlarge Image
Click to Enlarge Image
Click to Enlarge Image
Click to Enlarge Image

Click to Enlarge Image
Click to Enlarge Image
Click to Enlarge Image

Click to Enlarge Image
Click to Enlarge Image
Click to Enlarge Image
Click to Enlarge Image
Click to Enlarge Image

Click to Enlarge Image
This is the completed Shirasaya measuring over 60″ long. Now I’ll give may arms a rest for a few days!
Click to Enlarge Image

Click to Enlarge Image
Click to Enlarge Image
With the completed Shirasaya I am finishing the polishing work on the sword at this point. Below you can see some pictures of the process but if you want a better detailed understanding of the polishing process click here.
Click to Enlarge Image 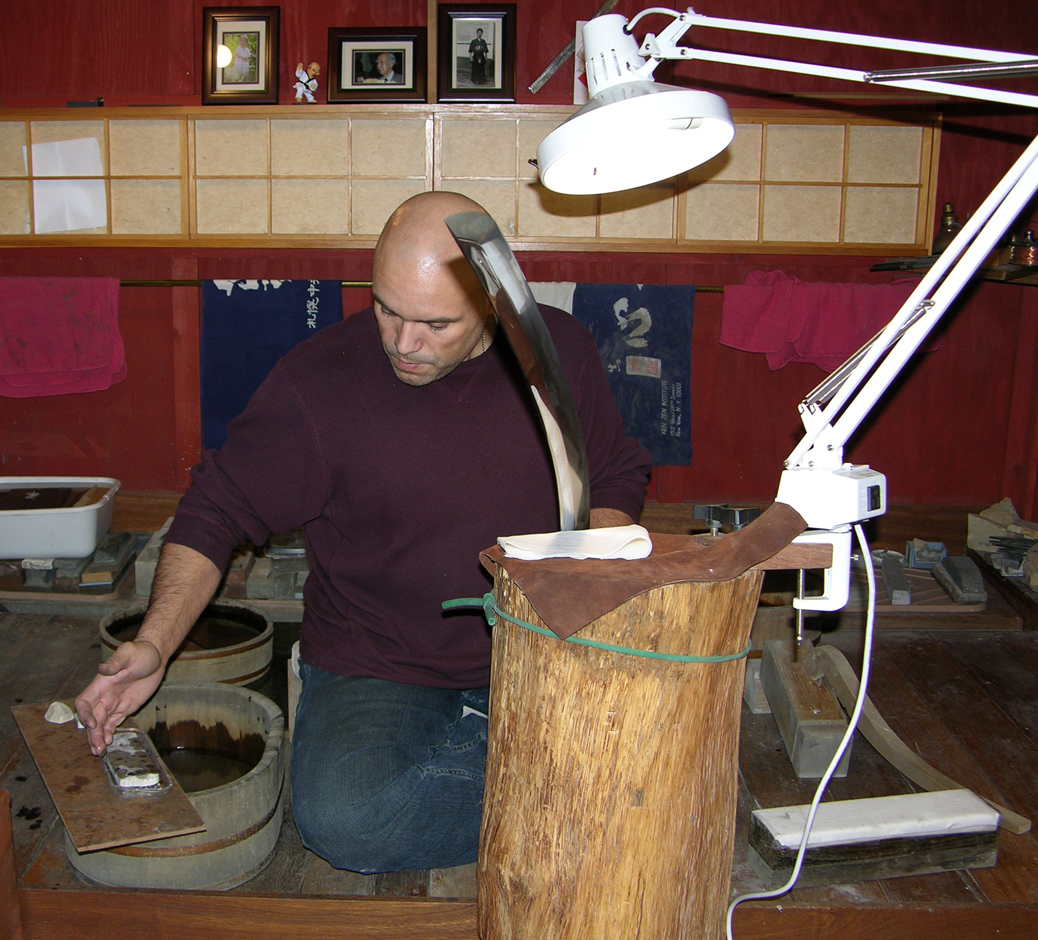
Click to Enlarge Image 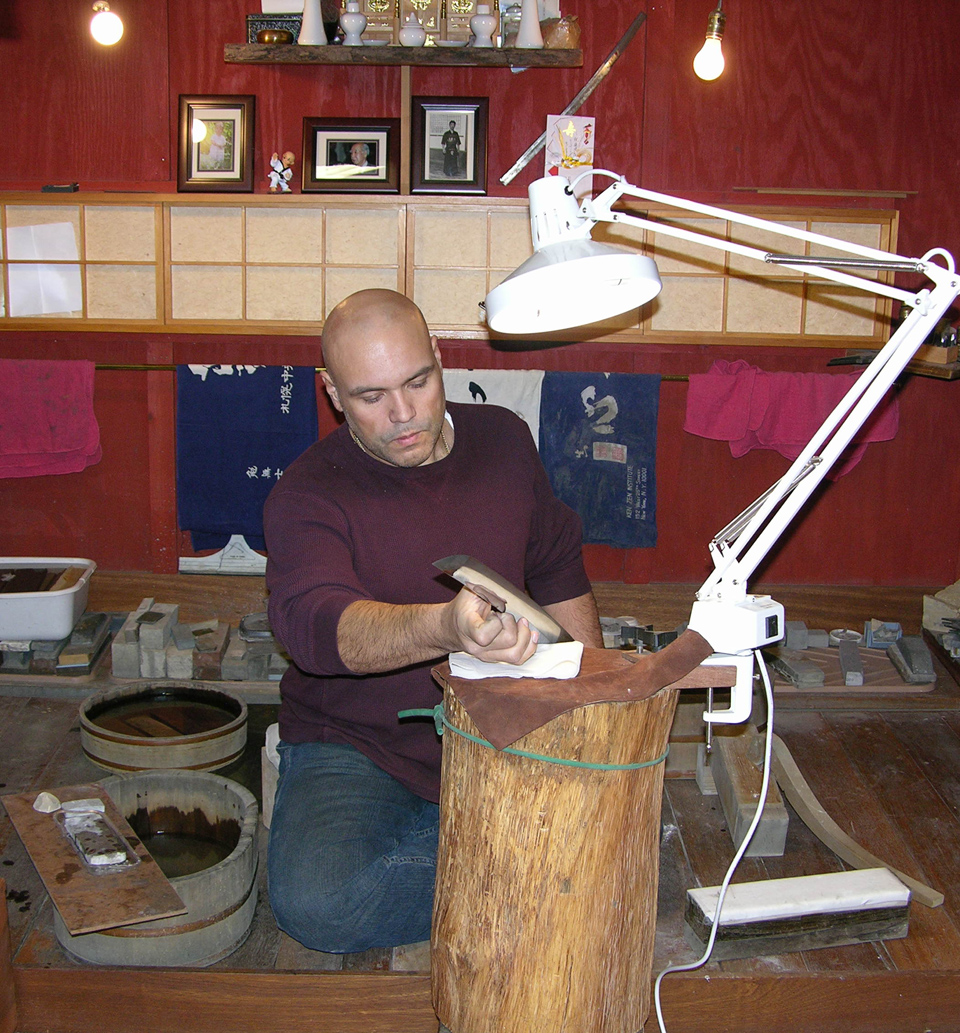
Click to Enlarge Image 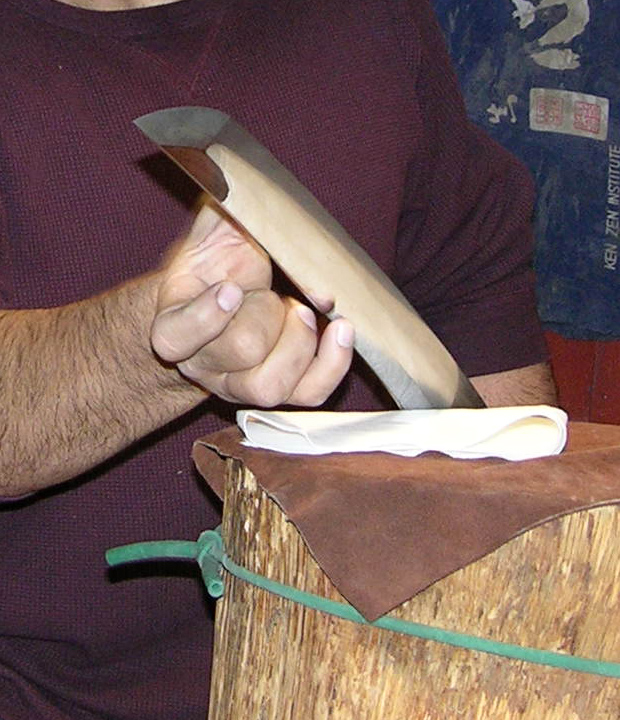
Click to Enlarge Image 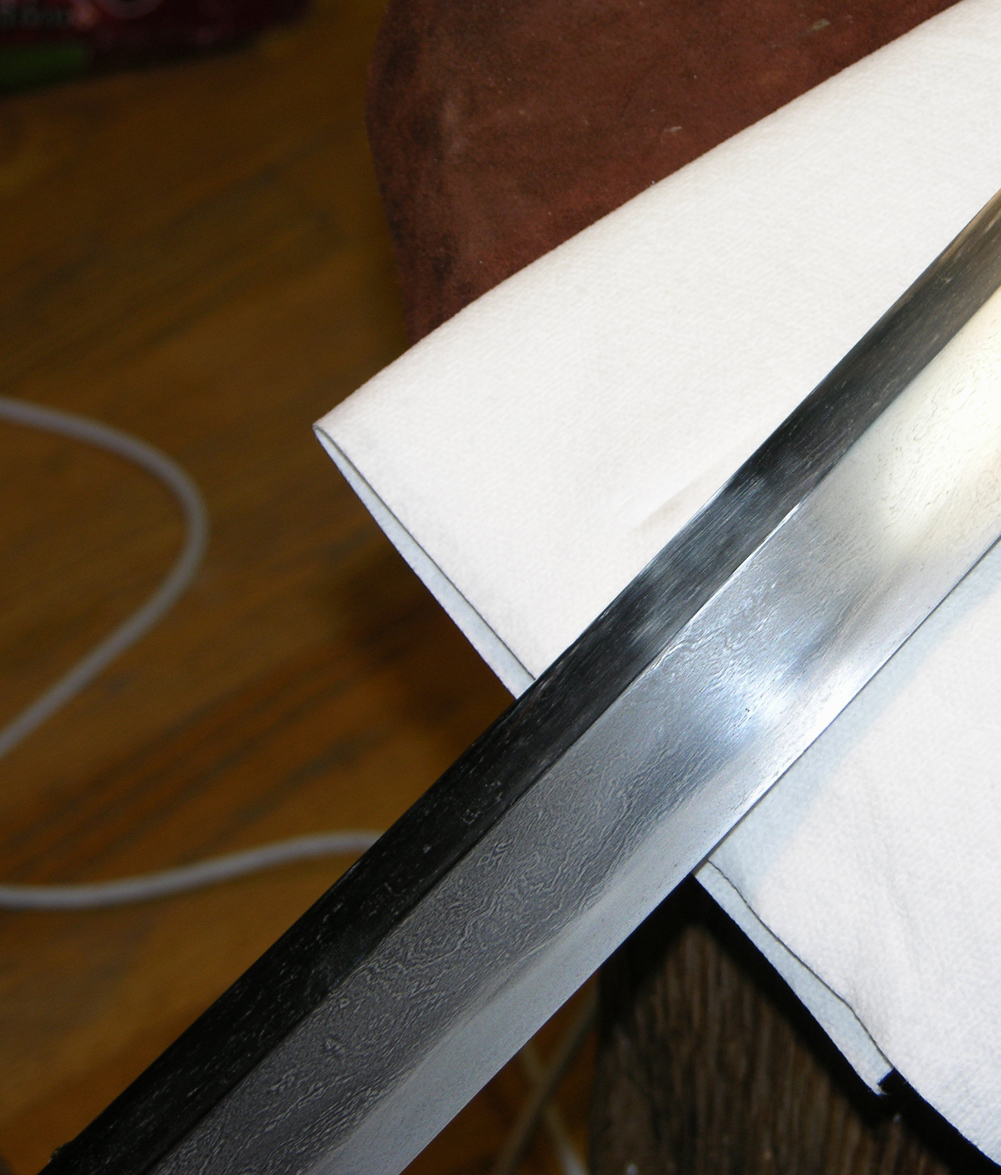
Click to Enlarge Image 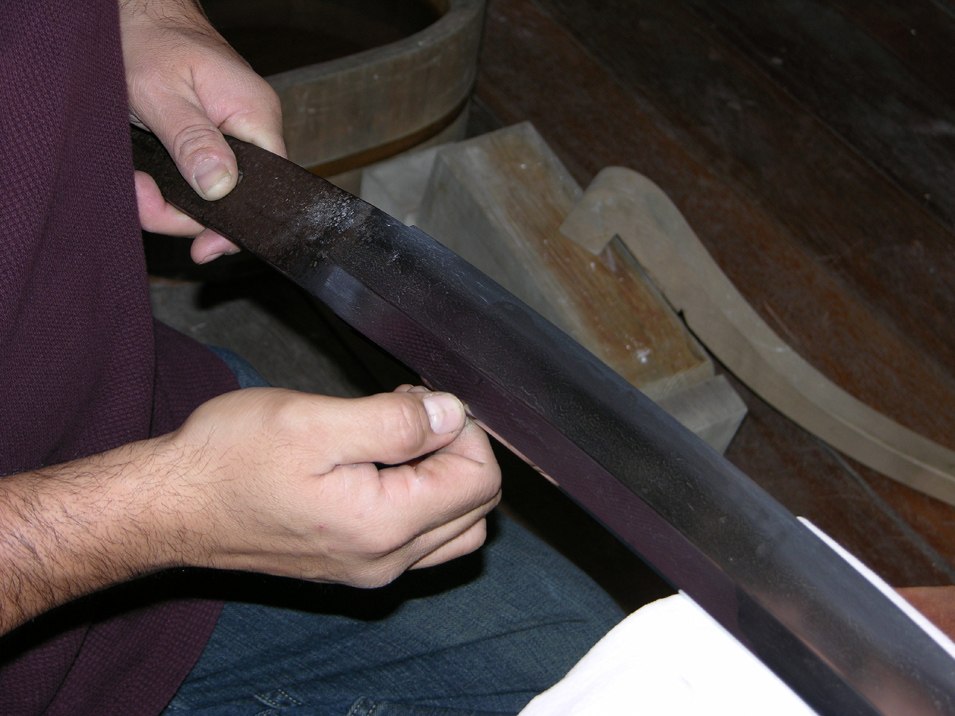
This is the fully polished sword ready to send back to its owner.
Click to Enlarge Image 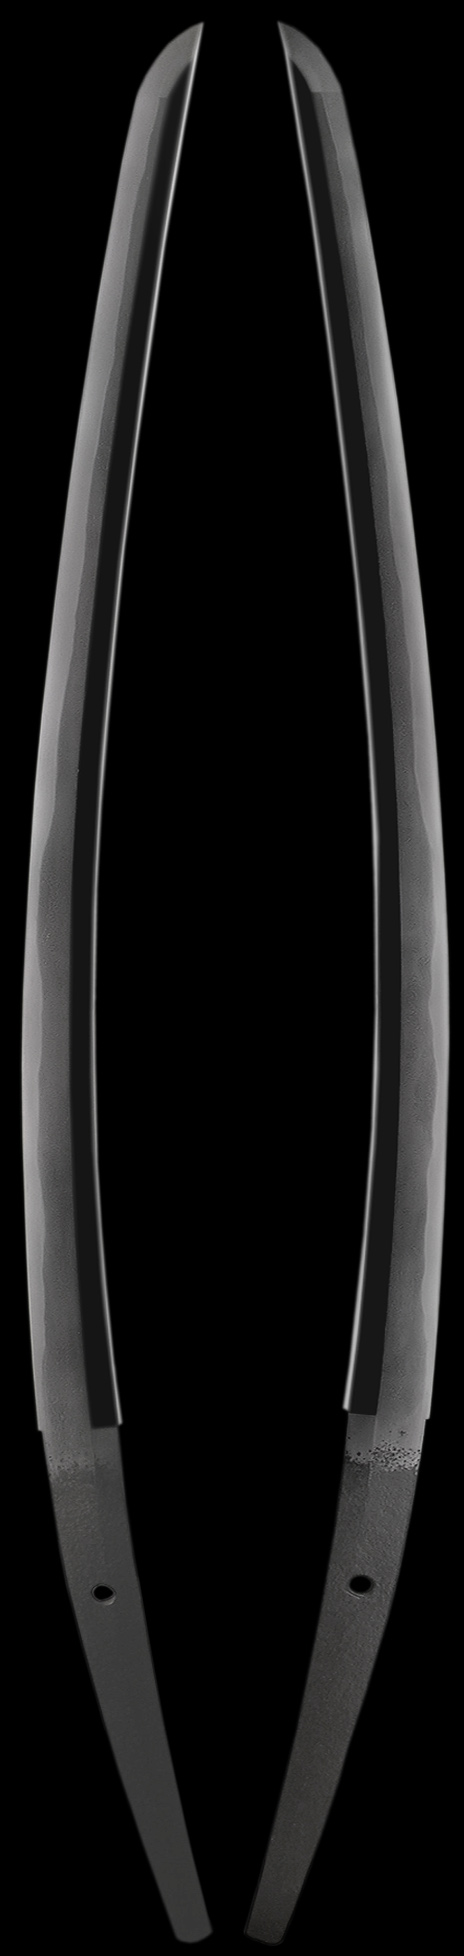
Click to Enlarge Image 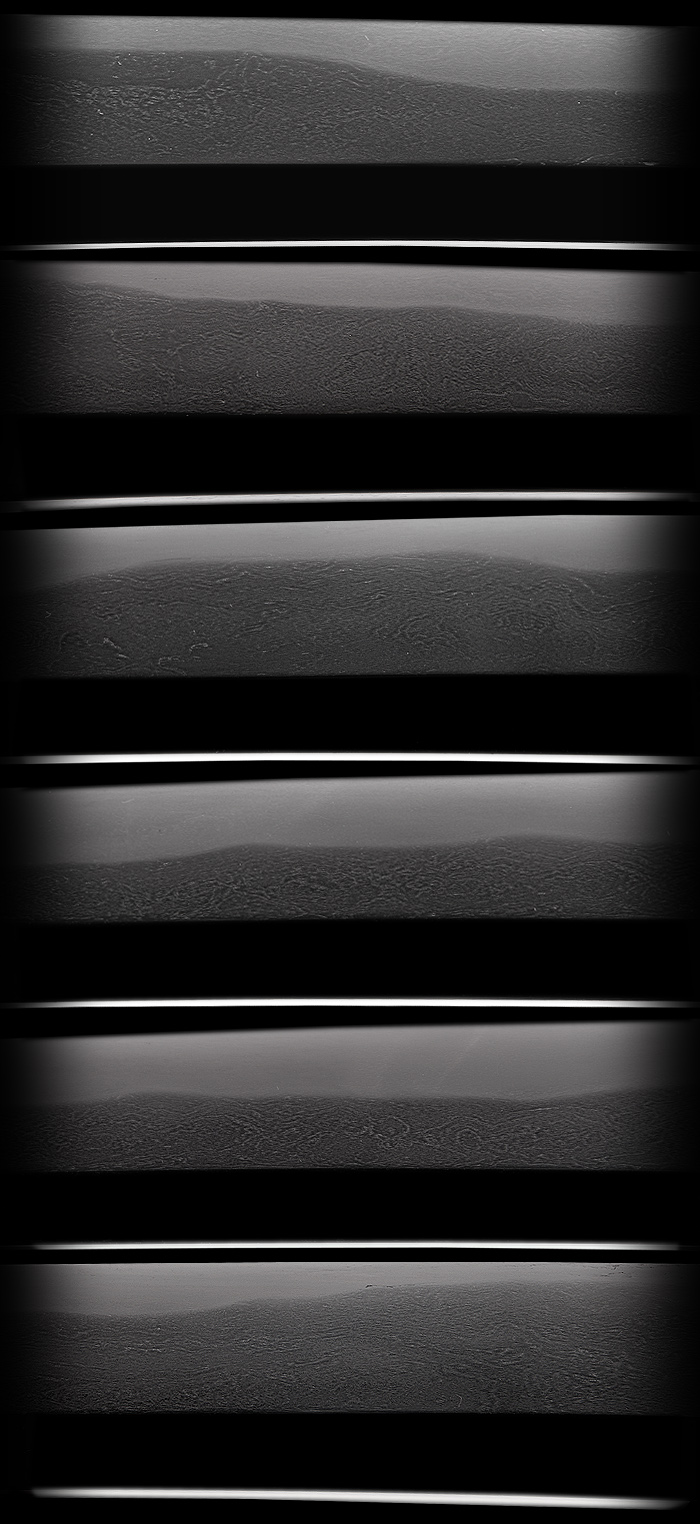
This sword was on displayed at the Chicago Sword Show 2007.
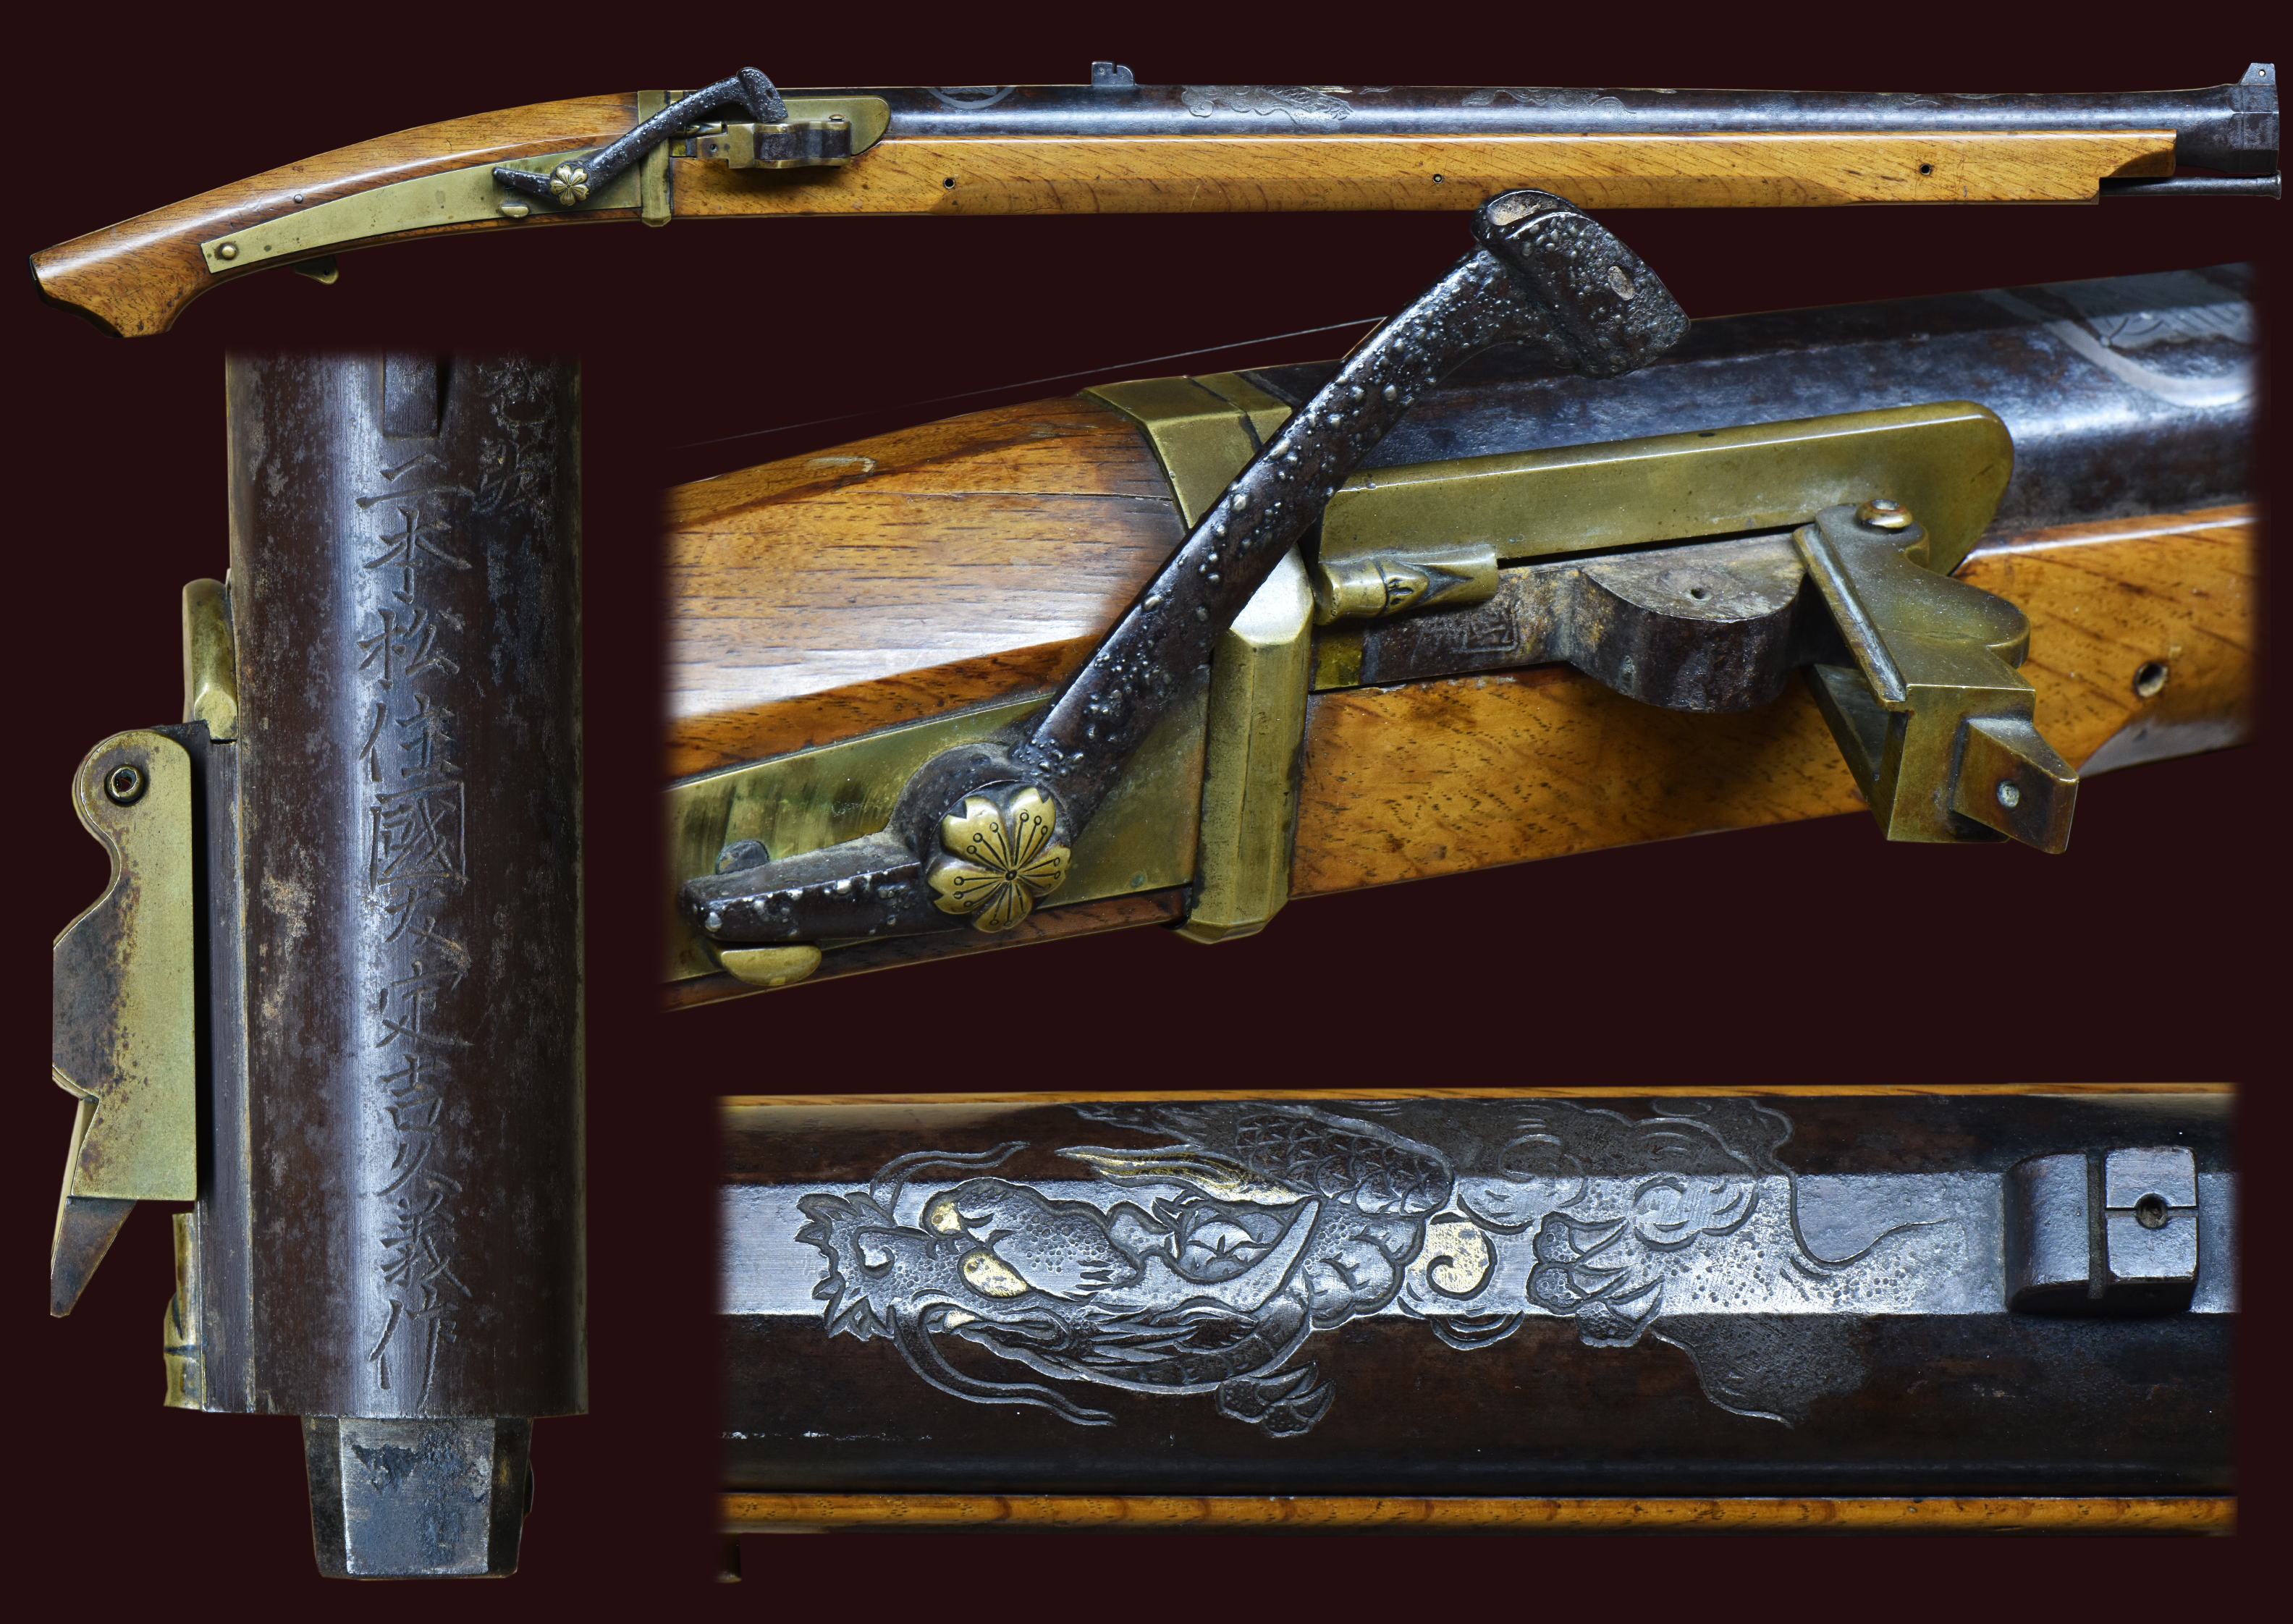
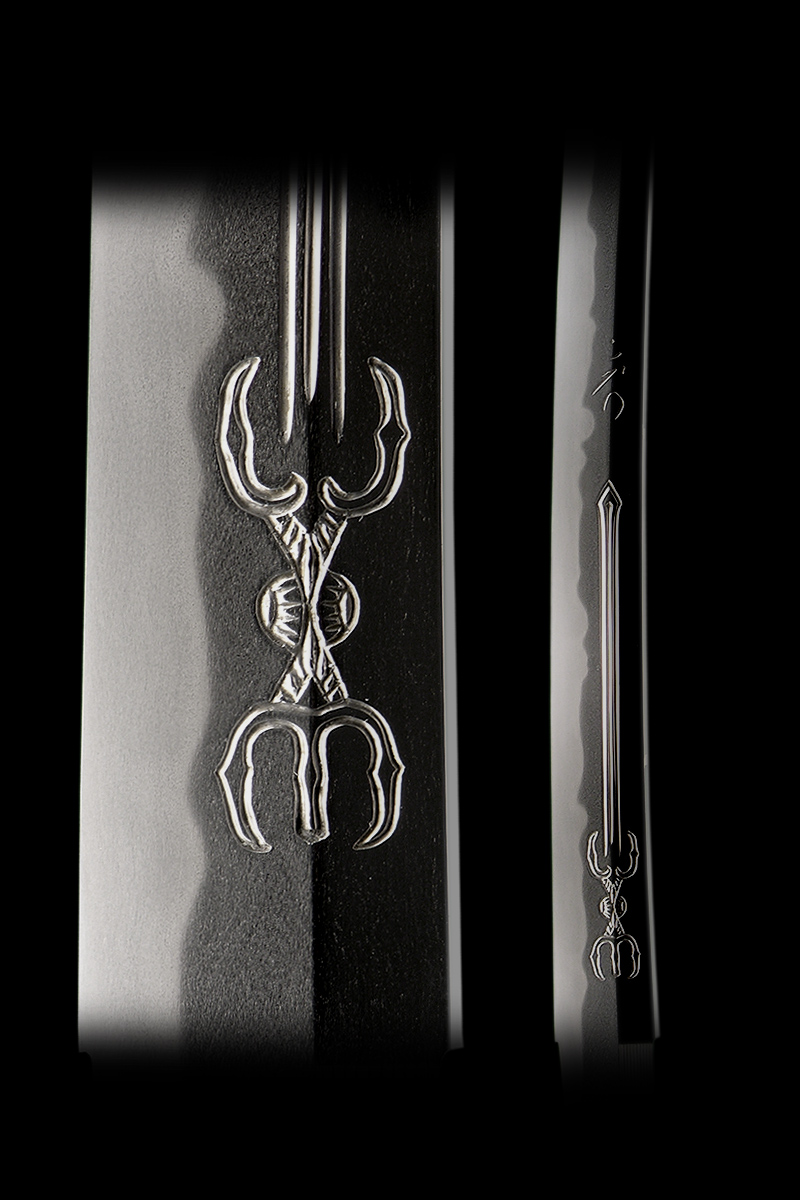
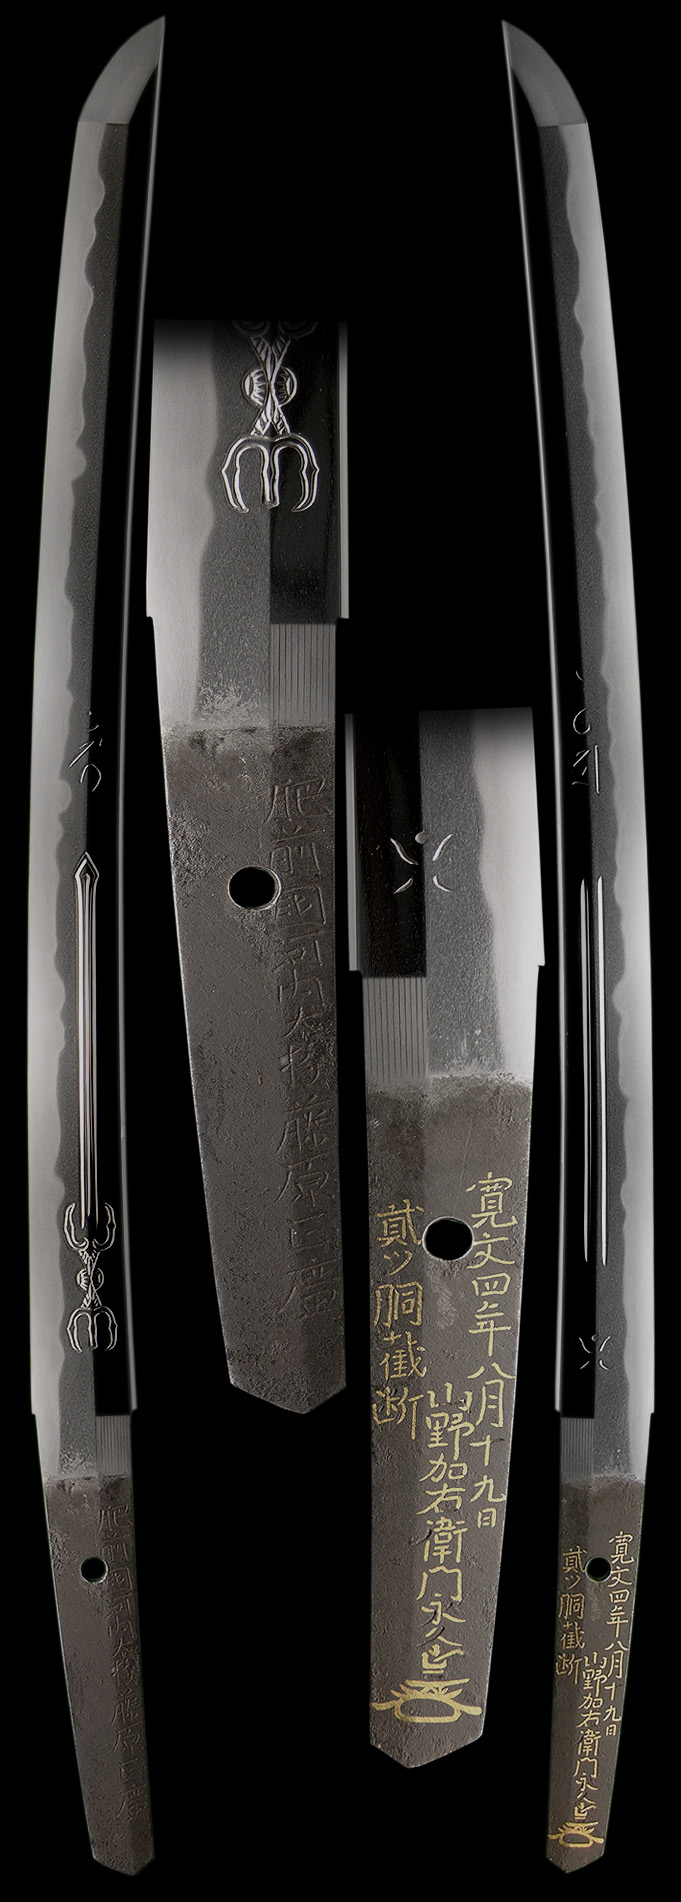
Horimono Repair
Back to Top
In Japan Horimono work is done by a specialist in Horimono or a habaki maker that can carve Horimono. This sword is badly damaged by deep rust that is deeper than the Horimono itself.
The original condition that this fine sword was found in.
Click to Enlarge Image
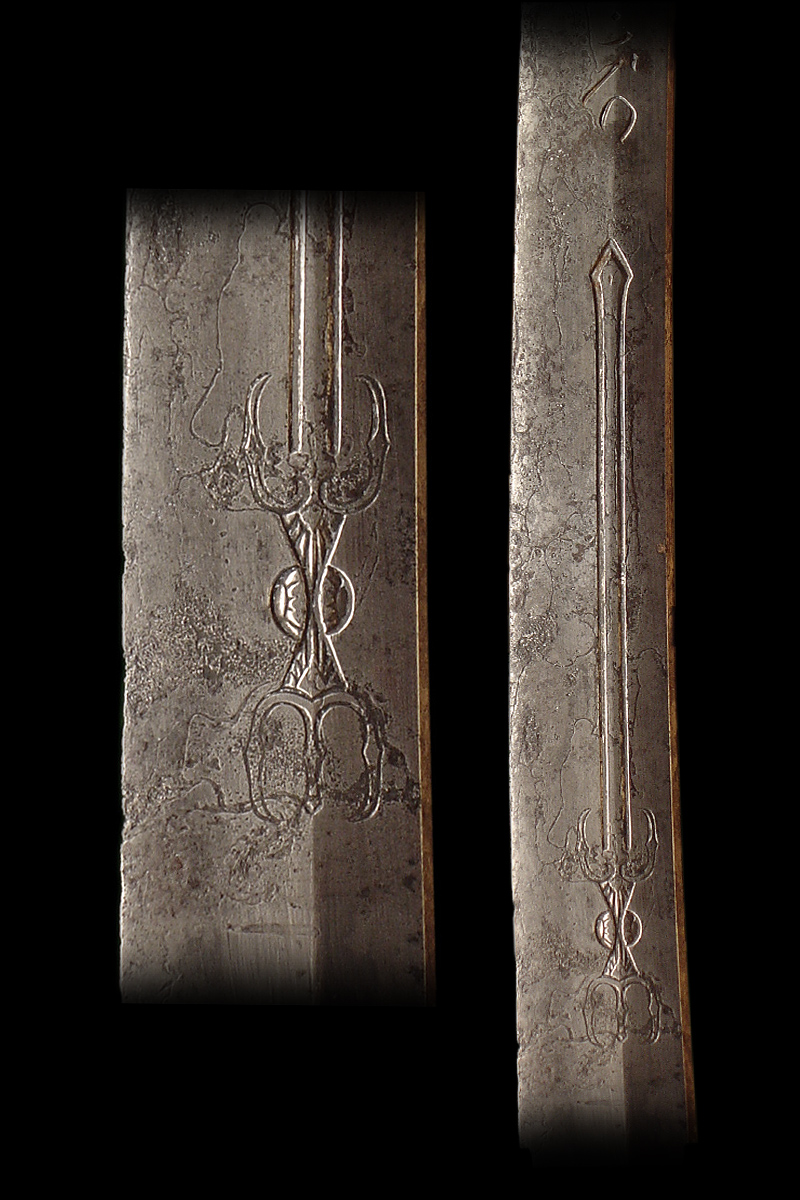
First step is to polish the sword then re-carve the Horimono to restore it to its original beauty.
Click to Enlarge Image
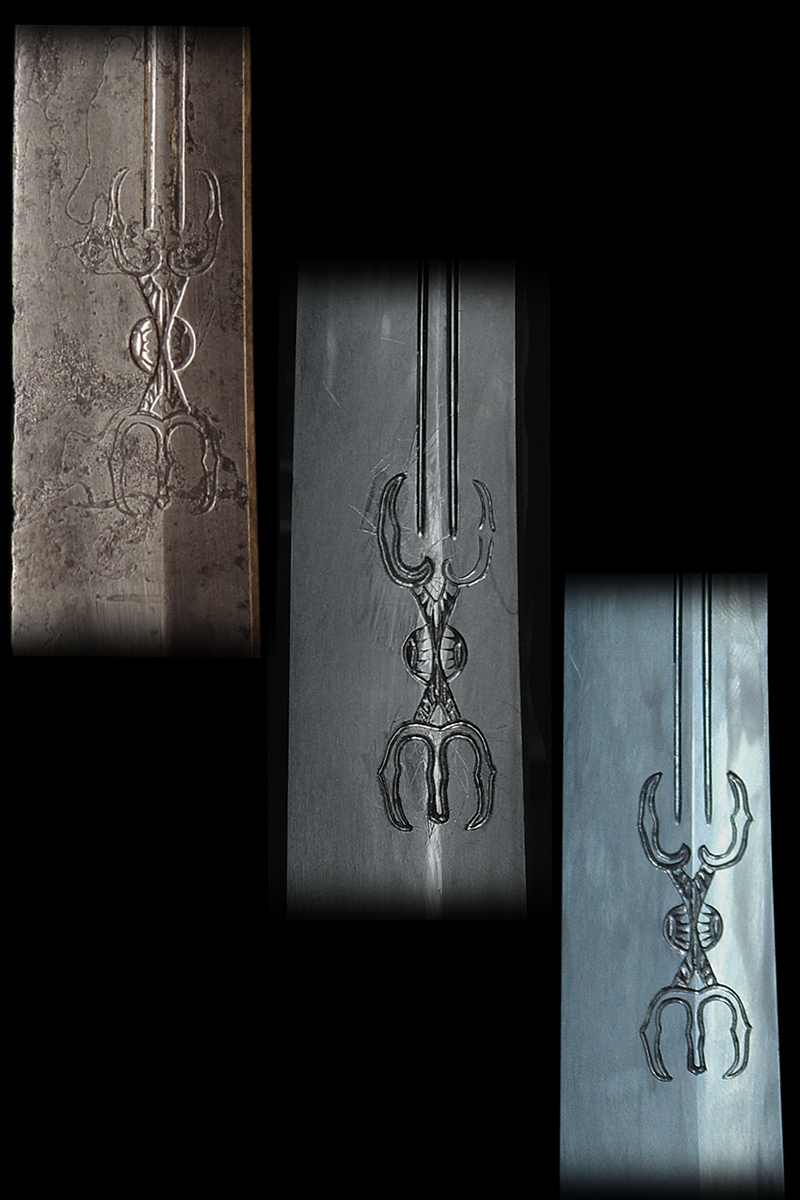
This is the finished product of proper restoration on a very risky and damaged sword.
Click to Enlarge Image
Click to Enlarge Image
Full or Touch-up Polish?
Back to Top
In Japan Horimono work is done by a specialist in Horimono or a habaki maker that can carve Horimono. This sword is badly damaged by deep rust that is deeper than the Horimono itself.
“FULL POLISH” incorrect description: To polish a sword from the course stones to the finishing polish that gives the sword a beautiful and correct appearance to the trained eye of a Japanese sword collector “regardless” of the sword or rust, any other problems or non-problems on a particular sword.
“FULL POLISH” correct description: To polish a sword after a complete analyses of the sword. The good points and the bad points have to be considered before a sword is placed on a stone. After evaluating the sword a professional polisher will choose at what stone he may want to start at. In many cases, a polisher can start with the Binsu stone or Kaise stone or Nagura stone (For more information please look at “Foundation Polish”). The Arato stone is very aggressive and should be avoided as much as possible. In this way he will remove as little steel as possible. Even starting at a later stone, the work will be very hard, so this sword is still receiving a full polish. After the foundation work the sword will be finish to reveal all the points necessary in a high level polish.
“TO CLEEN UP A POLISH” incorrect description: To redo a finish on a sword quickly and inexpensively. This type of work is not a professional job. It is done to re-sell a sword or to clean up a poor quality sword. A professional polisher that has a good reputation will never do this type of work, only amateurs will offer this in the US. A good sword should never receive this type of polish. Even if it is to be sold and re-polished later on, because steel is being removed for the sake of a sale and the sword is not being evaluated properly before grinding down the sword.
“TO RE-FINNISH A POLISH” correct description: In some special cases a sword that is in an old polish can be re-Finished if the foundation is deemed to be in good shape and the geometry is correct for the sword. This is to be judged by each individual sword polisher and his discretion. This polish is achieved by starting with the Uchigumori stone (For more information please look at “Foundation Polish”). Then the sword is finish to reveal all the points necessary in a high level polish. This polish will cost about 25% less than a full polish.
“PRESERVATION LEVEL POLISH” correct description: To polish a sword that is not of high quality but is in need of polishing for the sake of preservation. Such as in the case of a family treasure that is to be kept in the family. A high level polisher may choose to do this polish as a courtesy if asked. But generally he will choose not to leave any signatures under the habaki as in his high level work. It is understood that he is extending a courtesy in lowering his standards. In Japan some polishers specialize in this type of work. Generally this polish is 25%-40% less expensive than a full polish.
“Questions and Answers”
Q: If a sword has some rust or staining in one area why can’t a polisher work on that area and refresh the finish on the sword?
A: Any professional polisher can do this but it is an inappropriate thing to do. Because doing this will leave a dip or wave in the sword, plus the refinishing of the rest of the sword will have to be do with only Hazuya and Jizuya. There may be other areas that have very mild staining that may not be totally visible. At best the polish will look just ok. No good polisher will want to associate is good name to that kind of work, only a polisher that has no pride in his work and just wants the money will do this to a sword.
Q: If the tip of a sword is broken but the rest of the sword is in good polish. Does the sword need a full polish?
A: No, A skillful polisher should be able to re-shape the Boshi or tip without touching the rest of the sword. Now if the sword is in a poor polish a polisher will recommend re-polishing the entire sword and repairing the point at the same time.
Q: I have 2 swords that are in polish but it is an old polish. They have no rust, nicks, chips, or any other kizu. I have heard of a “touch up” polish. Is there such a thing or is the process still the same as a full blown polish?
A: A sword can be re finished if the original polish is deemed to be of good quality. Shape, geometry and over all it has no deep problems. The decision must be left up to the polisher. If a person is asking for a “touch up” just to save money and is not interested in what is best for the blade again a polisher may choose not to work on that sword. No professional polisher will grind a sword down from the first stones if it is not necessary, I certainly will not. The battle is to remove as little as possible and at the same time achieve the best results for a particular sword.
Q: If there is a difference in the technique, is there a price difference?
A: There is a small difference in price from refinishing a sword to a full polish. A polisher will do this only in special cases. The sword needs to have a good foundation, but this point has to be addressed by the polisher. A competent polisher can justify the reason why he may feel that the sword needs a full polish.`
Click to Enlarge Image 
Opening a window on a rusty Sword
Back to Top
If a sword is badly pitted or stained and a decision needs to be made about polishing the sword, one way to determine if the sword has a Hamone (Temper line) is to open two windows. One at the Boshi (point) and the other at them other end by the Hamachi (Were the cutting edge starts).
A window will help a Polisher decide if a sword can be polished, but other things also should be looked at and only a trained sword polisher can make that determination. Even then their is always a chance that the sword may not polish out properly. So a polisher can help a client come to a decision. The cost to open windows on a sword is minimal. A window is just one more aid to help with the decision of polishing or not.
Click to Enlarge Image 
For Sale